Thursday, August 18, 2011

Pull Up Your Stump: Dinner at "The Place"

Friday night I had the pleasure of being part of an amazing dinner at "The Place" in Guilford with my friends to celebrate Deanna and Kara's August birthdays.  For those of you, who have never been to "The Place", I would say this is one of those things that you need to plan immediately to tackle in the near future (and I will be more then happy to come along with you).  For those of you who have been, you know how wonderful it is!  Maybe this is a little aggressive, but I have no problem labeling it a Connecticut Shoreline shrine and somewhere you need to go at least once a summer.  Let me set up the scene for those who haven't experienced it yet: you pull up to an open lot on the side of the Boston Post Road where the only permanent structure is this small house that houses the bathrooms, supply closets and probably an office.  Then you have these very large fire pits and grills in the middle of the lot where all of the food is cooked that are surrounded by these large makeshift round and oval tables and the stumps (aka your seating for the evening...hence the "put your rump on the stump" slogan that occupies the back of the tee-shirts).  And that pretty much sums up 'The Place".  Now that you've gotten to the table, here is where the fun part begins.  'The Place" has a nice assortment of grilled and roasted meats on the menu and a few desserts but they encourage you to bring your own drinks, snacks, sides, desserts and any other accoutrement's that will enhance your dining experience.  I of course love this aspect of the restaurant and happily bring my tablecloth, candles and wine glasses and this time the cheese board even made an appearance. 

We went light on the sides this time so we could all enjoy the dinner that was ahead of us and started off with some simple snacks that I threw together quickly that were enjoyed with the awesome assortment of wine that Suzanne arrived with. 

 Next came the roast clam special and a round of roast corn for the table and then we all took the lobster plunge and ordered the roasted lobsters that come already cracked for you, so you just sit there happily puling apart the lobster.  I only started getting the lobster last year after some peer pressuring from Deanna and after one bite in my initial experience I was sold and can't even contemplate getting something else there now.  At one point when we were devouring our lobsters, I asked Deanna if she was going to take a photo and she quickly informed me to 'just focus on the lobster" so you'll have to go to see it for yourself. 

We finished off the meal with a Summer Crumble Pie that is a close riff on a pie that appeared in a recent issue of Bon Appetit.  The only thing I changed was instead of making it with solely blueberries I used the following fruit ratio that turned out great (2 cups blueberries, 2 cups peaches and 1 cup raspberries).   


right out of the oven...this is the money shot of the pie!!!

*All of the photos come courtesy of Deanna who is a far more talented photographer then I am so you are in for a special treat today.  Deanna, I have a wager for you: If you quit your job and become a professional photographer then I'll quit mine happily and open a bakery.  Here's to Plan B dreams!!!

Monday, August 15, 2011

CSA Week 10: The classic summer veggies

This week was actually the smallest box that we got so far.  Early in the week we had a wicked hail and rain storm that was absolutely unbelievable.  I had never seen hail so big in my life before and it really left it's mark on our plants at home and did some damage to the crops at the farm.  Here is what we took home out of our share:


-1 lbs of red potatoes
-1 sweet peppers
-1.5 lbs of yellow squash and zucchini
-1.5 lbs of cucumbers (slicing and kirby)
-4 large tomatoes
-2 large eggplant & 2 Asian eggplant
-1 small cabbage


the full share before it gets divided up

The Sunday right after we got our box I was dying for a classic, all-American, no frills summer meal so we had burgers on the grill, I made a mayo-based potato salad and an apple and poppy seed slaw with the cabbage that was featured in an old Bon Appetit magazine  that I can across when I was looking for another recipe in the binders.  The only change that I made to the coleslaw recipe was that I swapped out the frozen apple juice concentrate for orange juice (because really who has frozen apple juice in their freezer?) and it turned out great.

I was inspired that weekend while reading the New York Times Sunday Magazine which had a great article by Mark Bittman on "The Proper Way to Treat an Heirloom" and even though the tomatoes that came in the box weren't heirlooms, I knew they would work just fine stuffed with the mozzarella. Mark Bittman's recipes are always super easy and straightforward and he's like that faithful friend that will never stir you wrong when it comes to food.  I still miss his weekly "minimalist" columns in the Wednesday Dining Section of the Times but I will sacrifice if it means that he can be part of my Sunday ritual now.  These tomatoes were so easy to put together that it took me all of 10 minutes to make the filling and I totally admit that it took some serious will power not to abandon the recipe and just go at the bowl with a spoon because it was delicious just by itself.  The only thing that I added to the recipe was a few crushed up cloves of garlic and salt and pepper (it was never mentioned in the recipe so maybe it was just one of those obvious things that people should do?).   After a quick 30 minute bake, they were ready to consume and they reheated pretty nicely as well since I had the last one for lunch the next day.  


about to be baked
We hit the kale wall earlier in the season after consuming so much of it and I think zucchini is going to be the next one to occupy this spot because the squash just keeps on coming.  This week's zucchini recipe was another pasta dish that I loved so much that I actually made another helping of it to take for lunch the next day for when I went to work and I'm sure we'll have it again before the end of the summer.  I know I still have a few more good weeks of zucchini in me because we still haven't made the classic Bisquick quiche that my mother has made for so many years, the fried zucchini recipe that Melissa Clark had in the Times a few weeks ago and this very intriguing grilled zucchini ribbon salad from the new Food and Wine Magazine that came in the mail this week.  Hopefully I can resist the revolt for a little while longer with this lineup.  For now here's the zucchini pasta recipe so you can re-create it in your own kitchen:


Zucchini and Arugula Spaghetti
-In a large frying pan, caramelize a 1/2 of a large onion that has been sliced thin with a tablespoon or 2 of olive oil until it becomes translucent and begins to get that nice golden color.  Add in 4 or 5 cloves of chopped up garlic and let cook on low, giving it a stir every once and awhile to avoid it from burning.  
-Chop up one large zucchini into a 1/2 -3/4 inch dice and toss with 2 tablespoons of flour which will help it get those nice brown bits on the sides.  Toss the zucchini into the pan and let saute until soft about 10 minutes.  The flour is going to make things stick to the bottom of the pan.  Do not get alarmed, just give everything a stir every few minutes to keep it moving.  Season with salt and some crushed red pepper flakes.  
-From your pasta pot, add 1/3 of a cup (I usually use my ladle as a measuring cup so it would be one ladle) of the salted pasta water and let it cook for a few minutes, giving it an opportunity to be absorbed by the zucchini a little bit.  This will also help pick up some of those nice brown bits from the bottom.  Add a few tablespoons of pesto to the pan (I used my arugula pesto that I had in the fridge) and let everything cook on low until you are ready to toss your pasta in.  
-Once the pasta goes in, finish the dish off with a generous handful of Parmesan cheese and a few sprigs of chopped up basil.      


Thursday, August 11, 2011

Winner, winner pizza dinner

There is no dinner in the summer that I love more then homemade pizzas on the grill.  It's relaxed, it's casual and it gives you the creativity to come up with different toppings with whatever you have in your fridge at any given moment because really who wants to constantly run to the grocery store for one specific item.  It is a fabulous way to entertain because you can go simple with the apps and dessert and then be right there with your guests the entire time instead of couped up in a hot, sweaty kitchen while everyone else is out back enjoying drinks.  Last week, I had a bunch of veggies from the CSA in the fridge and a full evening ahead of me with nothing else scheduled so I could make a nice leisurely dinner that I wasn't up against the clock to get on the table so pizzas on the grill it was.  I always like to make a few varieties so I could try out new and different combinations and that way we all could have the sampler pack of the pizzas.  Here is the rundown:


 Remember the meatballs with the Swiss chard and tomato sauce that we had last week.  Well no meatballs were left but we had some of the nice chunky tomato sauce with the greens that I didn't want to throw out so here it went on a pizza with fresh mozzarella.


This one is sauteed eggplant with fresh ricotta on top.  The credit for this idea has to go to my friend Carmina (here is your blog debut!) who would serve a form of this type of pizza at her house growing up a lot when we would come over in high school and as a lover of eggplant any way, shape or form I was totally in love with this.  It's actually very easy on how to make the eggplant this way and can be also served as a bruschetta topping as well. 
-You want to have 2 good size eggplants for a 12 inch pizza to have enough (I know you're probably asking yourself "Did she really say 2 eggplants?" but just keep reading...).  Peel the skin off and either using a mandeline or a knife, slice the eggplant into very thin pieces.  Throw all of the eggplant into a large colander and toss a good amount of salt onto the slices, making sure they all get coated.  Now let it sit for a good 15-20 minutes so the salt can bring out the moisture in the eggplant because it is one of those vegetables that retains a lot of liquid.  This is one of those times when the longer it sits, the better.  Don't freak out if the eggplant starts to turn brown in the colander, it's going to happen and once you cook it, the worries can go away.
-Once you are ready to cook with the eggplant, take small handfuls of it and give the pieces of eggplant a good squeeze to get the rest of the water out.  You are not going to believe how much water comes out and how little the eggplant shrinks down to (hence needing 2 eggplants).  I usually do this process twice to make sure that all of the excess water is gone.
-Heat a large saute pan with a few good gulgs of olive oil.  Toss in half of a chopped up onion and a good handful of chopped garlic cloves.  Once the onions and garlic are soft, toss in the eggplant and let saute all together with salt and pepper until the eggplant is soft and cooked through about 15-20 minutes.  
-Carmima makes her pizza with calamata olives which gives her pizza a nice salty taste on top of the mellow eggplant but it is still good without them.  
-Finish the pizza off with scattered teaspoons of fresh ricotta and a thin dusting of Parmesan cheese. 


This pizza had arugula pesto, farm fresh grape tomatoes (which I have to tell you, it was a borderline miracle that they even made it on since I was starting to get very hungry as I was cooking and they were popping very easily into my mouth because they were so delicious!), chopped up shrimp and fresh mozzarella.  Pesto is one of those pantry staples that I always try to have in the fridge because it's so versatile to cook with whether you're using it as a spread on a sandwich, a marinade for chicken or vegetables or just a spoonful goes a long way in finishing off a pasta dish on the right note.    When making pesto whether it be a classic basil version or a different one with spinach or arugula, you can use these ratios and it is always going to come out good. 
-3 cups of packed leaves (in this case it was baby arugula)
-2 garlic cloves
-1/3 cup of nuts (I don't always have pignoli nuts in the house so you can substitute what  you have in the pantry.  In this case I used pecans but I have also used pistachios or walnuts in the past and they work well)
-1/3 cup of grated Parmesan cheese
-salt and pepper

Give all of these ingredients a few pulses in the food processor until they are chopped pretty finely.  At this point, start to drizzle in:
-1/2 - 3/4 cup of olive oil (I tend to like my pestos a little bit thicker because they are usually becoming another ingredient in a dish that I'm making but just eye ball the amount until you get to a consistency of your liking).


I pulled this idea for a fried green tomato and caramelized onion pizzazucchini  from their blog because it's hysterical).  I used to have major issues whenever I caramelized onions because they were never the sweet, jammy consistency that they would look like in a picture or how they would taste in a restaurant until I came across this article over the winter by Mark Bittman in the New York Times Magazine that has literally revolutionized my cooking skills of the caramelized onion.  I don't like to play favorites when it comes to the grilled pizza dinners because honestly they are all good but I think this one took the award today because it was just so different then a usual pizza.

Let me leave you with a few "trouble-shooting" tips to ensure pizza making success for all parties:
-Roll your pizza dough out before hand in the kitchen and have it arranged on parchment lined cookie sheets to it can be ready to go when you are at the point for it to go on the grill. 
-I like to have all of my ingredients arranged on a cookie sheet or tray right next to the grill so they are in close proximity and easy to grab because once the pizza is on the grill you don't have a lot of of lag time in between. 
-You only want to do one flip of the pizza dough on the grill so it doesn't get too charred in places.  Put the dough on the grill, give the side up a drizzle of olive oil and then let it cook for 2-3 minutes until it is ready to be flipped.  Once you do the flip you are ready to put your toppings on and then let it cook for a few minutes with the grill cover closed so all of the ingredients cook up nicely.
-I like to use my oven as warming or finishing stage in the pizza making process so that way everything comes out together at once and you as the host get to sit down and enjoy the meal with everyone instead of feeling like a short order cook.  I have been to large parties where the pizzas do come out gradually which works well for that scenario but if it is a everyday dinner, they can all come out at once.   


Friday, August 5, 2011

CSA week 9: up and over the hump

Here is what we took home in this week's box out of the full share:
-2 lbs of yellow squash and zucchini
-4 ears of corn
-2 lbs of cucumbers (slicing and kirby)
-1 lbs of red potatoes
-1 lb onions
-1 large eggplant
-1 bunch hakurei salad turnips

As I said in my previous post about CSA week 8, it is starting to feel like we are hitting a wall and are not going through the veggies as effortlessly as we did in the beginning.  But after a few days at home and a mental recommitment to the CSA cause, I'm ready to get back on the wagon and have a number of ideas for whats to come to carry us through the rest of August (and since this summer feels like it's going at warp speed, I have to squeeze every ounce out of it during this month).  We still have the turnips and red potatoes kicking around that I plan to use for dinner on Sunday where I've already decided that we are going to have a classic summer meal of hot dogs, hamburgers, potato salad and the classic Italian marinated string beans that we will talk about in the post for week 10.  We use a lot of the cucumbers just in salads but I've also been dying to try my hand at pickle making so depending on how many we get next week this will probably become my "DIY" project.    The zucchini and corn went to another batch of pasta that we had on Monday night which was great and my mother actually embraced her inner baking skills as well and made a chocolate zucchini cake that our friend Maria had passed along the recipe of.  I was pretty excited when my mother informed me she was going to bake because you have to understand that she has never really been an enthusiastic baker so I knew that when these rare moments happen, you have to savor it and enjoy them.  The only adjustment that was made to the recipe was that the nuts were omitted but they were not missed at all and  I look forward to making it again when we have a plethora of zucchini.  I will talk about how I used the onions and eggplant in the next post but the food that needs a few minutes of recognition was the meatballs with the Swiss chard and tomato sauce. 

Wednesday, August 3, 2011

Happy Birthday Andrew!!!

I couldn't resist but to give my brother Andrew a big birthday shout out on the blog...

To one of the most enthusiastic eaters to consume my cooking on a regular basis, the original "earthy crunchy" in our house, and our own personal wine man -  Welcome to the year of 25!!!!  I always joke and say that everyone should be my brother because he's just an all around wonderful individual who happens to fall into these great experiences that I'm always quite envious of but to be his sister is a pretty close second. 

Happy Birthday! 

PS: I couldn't have picked a better picture to desribe him...this is so Andrew!!!

Tuesday, August 2, 2011

CSA Week 8: Part 2: A plethora of farm fresh veggies

 I've realized that I've become somewhat of a slacker blogger this week considering we are almost at the end of week 9 and I'm still talking about what we ate during week 8.  But sometimes life gets in the way and it's been a really busy past few weeks...like can you honestly believe it's frickin August already!  I'm still trying to figure out where the hell July went and when I'm going to be able to squeeze some of those leisurely beach days in before labor day comes along and then before you know it we will be in the throws of fall, picking apples (nothing like mentally rushing the seasons).  So to put week 8 to bed in order to move onto week 9, here is a quick run down of a few of the gems that we consumed last week.  If anyone would like a recipe feel free to comment and I promise to be back on the recipe kick next week.   

just another way to consume the kale...I ended up mixing some sauteed kale with the 3 grain blend from Trader Joe's and Parmesan cheese to give it almost a risotto like texture. 

The Canal House roasted squash with breadcrumbs
Israeli couscous with grape tomatoes and basil

I'm still trying to get the hang of this whole blog concept because usually halfway through any given meal that I cook, I jump up to photograph whatever dish we are eating before it is completely consumed so all of you have a visual.  Unfortunately  I wasn't fast enough with the fried green tomatoes and this week's batch of zucchini fritters but it was probably a good sign that there wasn't anything left to take a picture of!!!

Wednesday, July 27, 2011

CSA week 8: Part 1: The corn has arrived!

Here is what we took out of our full share this week:

-1 head of cabbage
-3 lbs of yellow squash and zucchini
-1/2 lb beans (yellow)
-1 greenhouse cucumber
-1 lb pickling cucumbers
-1 bunch of swiss chard
-1/2lb bag of leaf lettuce mix
-1 bunch curly kale
-8 ears of sweet corn

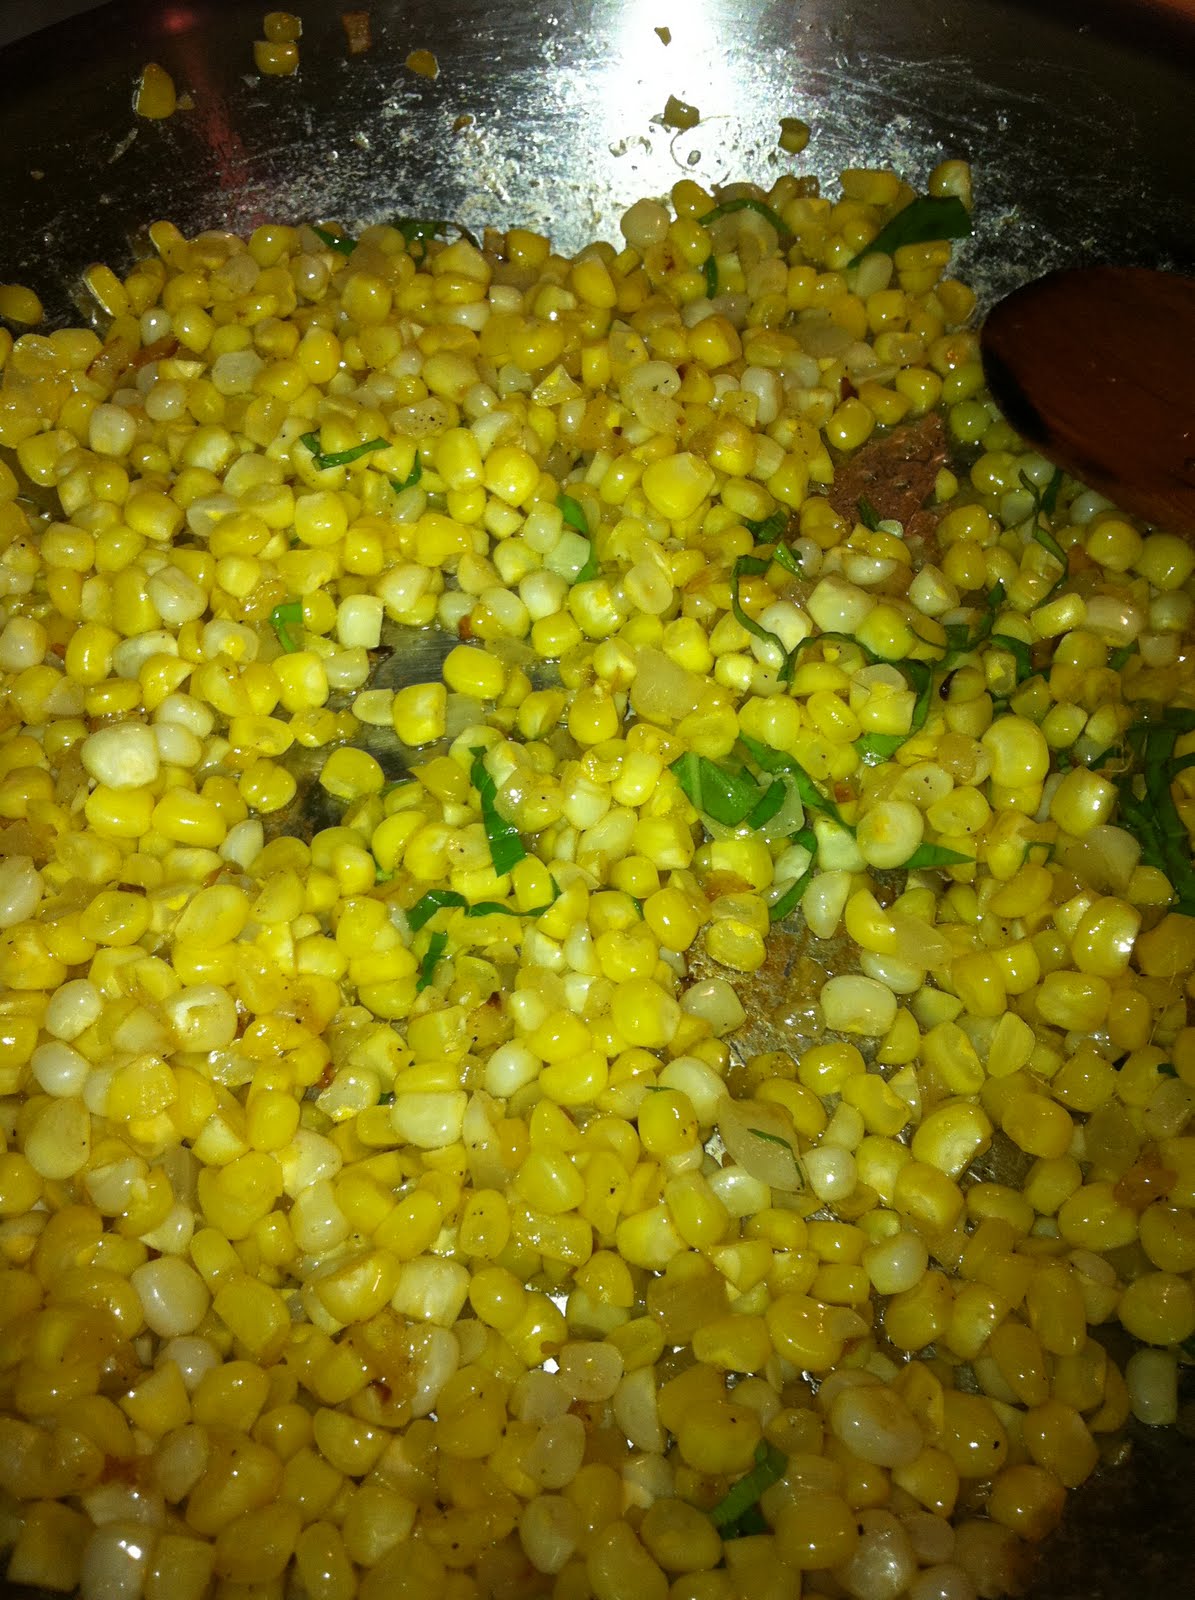
I'm going to dive right in because we have had quite the busy CSA week and good things are still to come!  The way I'm going to do this week is actually break it into a few posts so you don't feel like you are reading a novel and that way there is more to enjoy.  I was home for a few days to recharge and beat the heat in Connecticut so on Saturday night, we had a few people over for dinner and I made one of my favorite meals: shrimp tacos, black beans and rice, a creamy cilantro slaw, and did a quick pan saute on the corn.  This was the first corn of the season that I had from the farm because I personally hate buying corn from the grocery store and the flavors were so amazing that it was worth the wait.  In the past we were always believers in the method of just boiling the corn and then eating it right off the cob and I had many happy corn filled summers like this.  But I was looking to try something new so here is the run down of the corn and this is going to be the preferred method of cooking this summer because its so easy.
-Cut the kernels off the cob using a sharp knife or a corn zipper (I should probably be an advocate of the corn zipper but if you are confident with your knife skills then go for it).  See the picture below for the technique that you want to follow when cutting.  It always helps to have a flat surface so that way your corn cob isn't tilting all over the place.  There is no other way around this but you are going to have corn kernels flying all over your counter when you are cutting them off.  It's just the nature of the game and I promise that it's worth the cleanup.

-Heat a few tablespoons of butter in a large frying pan until melted.  Toss in some chopped up onion and a few cloves of garlic and saute for a few minutes until it starts to get translucent.  Toss in your corn kernels and let saute for another few minutes, giving it a stir every once and while making sure it all gets coated in the butter.  Once your corn is tender but still have a nice bite, finish it off with salt and pepper and throw in a few leaves of chopped up basil.  


Tonight I was feeling a bowl of pasta so after a quick inventory check of the fridge this is what I came up with:
Spaghetti with bacon and squash
-Heat your large frying pan (if you haven't figured it out yet, one of my go to pans is a 12inch fry pan of a 4quart saute pan because they are so multi-purpose) until hot and toss in 4 slices of bacon that you chopped up into a 1/2 inch dice.  Once this starts to brown, toss in 1 cup of squash (I used a combination of zucchini and yellow squash) that you have cut into 2 inch long matchsticks, and 2 cloves of chopped up garlic. 
-Let this all cook together for a few minutes, then add 2 tablespoons of butter and about 1/4 cup of heavy cream and continue to cook until your sauce starts to thicken up.  
-Meanwhile have your pasta cooking next to the frying pan (I used a 1/2 pound of spaghetti) and steal a ladle full (or 1/4 cup) or the starchy pasta water to add to your frying pan to help your sauce along.  The pasta water tip has truly revolutionalized the way I cook pasta and this simple step makes such a huge difference.  
-Once your pasta is ready, toss it into the frying pan giving everything a good coat.  Finish the pasta off with salt, pepper and a few tablespoons of parmesan cheese.