Saturday, September 8, 2012

How to Monogram a Cookie


For all of those monogrammed obsessed individuals out there just like me here is another thing to add to the favorites list that includes Anthropologie "Letter" mugs and LL Bean boat and totes...The Shortbread Rhubarb Sandwich Cookie aka the "Initial Cookies".


 *Note:
-The jam recipe that goes along with the recipe is fantastic but if you aren't into making your own fillings, don't let it be a deal breaker for not making the cookie recipe.  Any good quality jam is a good stand in for a cookie filling.  I would just recommend pureeing the jam in a mini prep for a couple seconds to make it spreadable.


Sunday, July 29, 2012

Eat what you know

Today I had the opportunity to tour the grounds of the farm that our CSA box comes from.  I know I haven't blogged much about our second year as CSA-er's and our adventures with the weekly box but I can tell you that we are enjoying it just as much as we did last year.   What's nice about no longer being amateurs in the CSA world is that in year 2 you know what to expect above all else.  You know to pace yourself especially when it comes to those lovely leafy greens and how to avoid the burn-outs that we experienced last year of what felt like endless weeks of eating the same veggies.  You become better prepared about how you plan to use your veggies as you've now had an entire year to remember recipes (and think of 18 different ways to conquer the kale) and how to look ahead with the help of the freezer in order for things to be there if you aren't quite ready to use them just yet.  


So we set out today to tour the grounds of Stone Gardens Farm in Shelton and got to hear first hand from our growers, Stacia and Fred what it's like to grow a wide range of veggies that provide for close to 1000 CSA boxes each week and has made them one of the most popular farms in Connecticut.  Shown below are a couple photos from the tour and above all else it gives you so much appreciation for what you're eating and everything that goes into it.        It allows you to never look at a veggie from the grocery store and a veggie from the farm in the same light again because there is no way they are created equally.  I found the grounds breathtaking and beautiful and maybe just maybe I finally have become one with nature as my Mother so often urged me to do when I was younger as we were on a ski lift or a beach.  It was fun to pick the brains of the farmers and I came away learning a lot of new things about growing and farming and without a doubt can see their commitment to producing great crops.  


rows upon rows of beets

come on eggplant...I'm ready for you

excited to see the different varieties of peppers that are a few weeks out

corn for as far as you can see 

squash plants in the front, tomatoes off in the distance


Wednesday, July 25, 2012

Yumaste

Maybe it's been all the yoga that has recently entered my life or no longer feeling like I'm wasting away on a hot, crowded Metro North train on a daily basis or just the Summer season in general but it feels like I'm in a "new found, semi -permanent state of calm".  (If you asked me a year ago, I would have never in a million years described myself as someone in a state of calm but I guess a 4 month sabbatical can do that to you) .  There have been the "ease into the day type of weekends", a fast growing addiction for the Sunday nightcap bev to fight off the end of the weekend depression and the habit that you can only really get away with in the Summer of the daily cocktail (or 2) enjoyed on the deck.  It's where you can sit for longer then you usually allow before running off in 17 different directions.  You find yourself putting off the projects for another day because you just want  to soak it in and breathe it out as those "over-stimulated" days are right around the corner.  


Here is the latest cocktail to make it into the rotation thanks to Mario Batali  found in last week's NY Times Sunday Magazine 


The Yumaste Rhubarb Gin and Tonic


In a small sauce pan combine 1 pound fresh rhubarb that is cut into a 1 inch size dice with a simple syrup solution  that is made  up of 1 and 1/2 cups each of water and sugar.  Let the rhubarb pieces poach in the liquid for a couple of minutes over medium heat until they become quite soft and their color and flavor mixes into the liquid.  Let the liquid become a nice syrupy consistency where it reduces a bit and then strain the rhubarb pieces out of it that can be saved for another use (crisp, ice cream topping, jam mix in, all of the above).  Here you have your rhubarb simple syrup that will store quite nicely in your fridge for whenever your beverage (alcoholic or not) needs an instant pick me up.   I also have to mention that it is this fabulous bright shocking pink color that you will immediately fall in love with.  


Now onto the drink making:
Fill a highball or tall glass with ice.  Pour in between an ounce and ounce and a  half of the rhubarb syrup depending on how sweet you like your drink into your glass (I actually went with the method of pouring my syrup in a plastic squeeze bottle so I've just been doing a generous squeeze).   Next add your gin depending where you like your like drink to be. (If we were going with an official recipe, I would say 2 ounces but  as you can see from the picture we enjoy our cocktails in this house out of glasses that have lines etched into them which I use as the pouring gauge).  Fill the remainder of the glass up with tonic water and top with a freshly cut piece of lime.  Give it a quick stir and I assure you that the calmness will set in for you too.


"Treat yourself.  Don't cheat yourself" is actually a favorite and well-used phrase of my brother that works perfectly here for this note.  When it comes to drinks like G and T's go ahead and treat yourself to really good quality ingredients because they will make something classic and simple taste so much more delicious.  We have gotten hooked on the habit of high quality tonic waters such as Q tonic that can be found at Whole Foods or Williams-Sonoma and the fact that it comes in small bottles basically eliminates the issue of breaking into flat tonic water.  Our gin of the moment is Greylock Gin from the Berkshires because why wouldn't you want to drink something made in New England?

Thursday, July 5, 2012

It could have come straight out of Maryland...

When we were in Annapolis a couple of months ago I had a major tease when it came down to the land of desserts.  The short story was that we were in a classic seafood restaurant consuming our fair share of crab (because when in Maryland what else are you going to eat?) and discovered something on the dessert menu called "Smith Island Cake" which I had never heard of before.  After a quick educational session from one of my cousins, I learned it was the official state dessert of Maryland and was a cake consisting of numerous thin layers sandwiched between frosting and crushed candy bars.  I was instantly intrigued and while too full to consume it then, the plan was hatched for later to hunt down an authentic slice of cake.  Well needless to say, the plan was foiled by a different restaurant changing their menu and we left Maryland with only the chasing thought of what the cake could be like.  


But I'm a girl who is a doer that takes matters into her own hands and figured "well if I can't have the cake somewhere, then I am just going to make it myself" and the latest baking challenge was born.  So here I was last weekend, hosting a birthday cookout/luncheon for one of my Uncle's as well as aligning perfectly with my Maryland (soon to be San Diego) cousins up visiting and I knew this was going to be the right opportunity to try my hand at the Smith Island Cake.  And maybe I was delusional from baking in the heat but when I finished baking it the night before and stood there examining my finished cake with my mental baking high, I knew that I did Maryland quite proud on this one.  This is one of those cakes that is really easy to make and actually starts with a boxed yellow cake mix.  I followed the recipe pretty closely from Saveur Magazine that I followed pretty closely but swapping out their chocolate frosting for my "tried and true, never fail" chocolate sour cream frosting that I can literally eat by itself it is so frickin good.  The cake also has an almost perfect ratio of cake and frosting and as we were devouring it on Sunday, declared it a perfect birthday cake as well.  It might just be the official state dessert of Maryland but it is now going in my own personal rotation of go to/perfectly domesticated desserts.  


this was one of those moments where half way through consumption, I had the "H.S." moment of forgetting to take photos so here it is in half devoured form.  You can see the layers at least.


Smith Island Cake 


-Preheat your oven to 350 degrees.  Spray 4 8-inch round baking pans with nonstick baking spray or grease generously with butter and a heavy sprinkle of flour.  (I only own 3 8-inch rounds so I just did 3 rounds of baking instead of 2).


-In a food processor pulse 4 frozen large Reese's peanut butter cups into a fine powder and transfer into another bowl until later (I would suggest refrigerating  so they don't melt all together).  Pulse remaining 4 large Reese's peanut butter cups into small chunks and transfer to another bowl and chill.


-In the bowl of an electric mixer, mix together the following on low speed until well combined about 10 -12 minutes:

  • 8 tablespoons or 1 stick of unsalted butter, softened
  • 1  18 1⁄4-oz. box yellow cake mix, preferably Duncan Hines
  • 1 and 1/2 cups evaporated milk
  • 1 teaspoon vanilla extract
  • 4 eggs at room temperature 
  • 1/3 cup of water 
-Pour a thin layer of batter into the prepared baking pans (it comes out to be just around 2/3 of a cup.  You want it to completely cover the entire bottom of the pan but not too high at all because remember we are going for thin layers here.)  Set remaining batter aside for next rounds.   Bake until cooked through and golden around edges, 11–14 minutes. Set aside to let cool slightly, then loosen cake layers with a knife and invert onto cooling racks and then you can layer them with parchment on a cookie sheet until you are ready to assemble. Coat the pans with whatever method you are using and repeat the process a second and third time.  (Round 3 will only be 2 pans instead of 3 to get you to 8 layers).  

-As your cake layers are cooling, make your icing from the link listed above.  Take your first cake layer and spread about a 1/3 of a cup of frosting evenly onto it.  Sprinkle about 1 tablespoon powdered peanut butter cups onto the frosting and repeat with remaining layers. Frost outside of cake with remaining icing on top and sides and sprinkle peanut butter cup chunks on top.  

Monday, June 25, 2012

Back on the bike...

You don't have to tell me it's been awhile since I've updated this lovely little food blog of mine.  Don't think I forgot about it which wasn't the case as all.  It was a combination of time management,  too many activities, wanting to squeeze even more in and not enough hours in the day (which I know I'm preaching to the choir but really how about only a couple more hours each day?).  So here I am back on the bike and committed once again to the blog because come on; it's June, it's the land of summer dining and living and year 2 of the farm share has begun again and how can you not want to write and share about all of the adventures that happen in the kitchen.  So here is a recap of some favorites that have come out of the kitchen over the last couple of weeks:


-Rhubarb Ice Cream with a Caramel Swirl 
I have mentioned it before but I have somewhat of a love affair with all things rhubarb and I know that I don't remotely consume enough of it.  It is one of those wonderful vegetables that plays well either way whether it is being prepared in a sweet or savory dish and it is kind of the forgotten spring/summer option behind all of those berries.  I once had a rhubarb gelato at Capogiro in Philadelphia which was amazing like the rest of their flavors so when I came across this recipe in the NY Times a couple of weeks ago, it wasn't even a question of whether I would make it but when.  I was able to get a bunch of skinny stalks of rhubarb at a local farmer's market  one weekend and we were on for the first batch of ice cream for the season.  I actually used my tried and true Philadelphia Ice Cream Base and then just picked up the recipe when it got to simmering the rhubarb until tender and making a silky caramel sauce.  The original recipe looks delicious but I am a fan of egg-less ice creams because they tend to air on the lighter side and require much less prep and waiting time.  As I learned the first time I ever made ice cream, as I was heating eggs over a double boil and using every bowl in my kitchen this wasn't going to work out so well for me and therefore adopted the Philadelphia method which makes it so much more pleasurable to whip up a homemade batch of ice cream pretty much any time we wanted it with hardly breaking a sweat.  The ice cream has a sweet mellowness to it from the rhubarb and a fun twist with the added caramel.  Can't wait to make it again this time with a batch of snickerdoodle cookies to sandwich the ice cream between.


-Whipped Peanut Butter Frosting
The catiecakes have made multiple appearances all over Southern Connecticut in the month of June and this Peanut Butter frosting is the newest, popular addition to the mix.  Spread it on a brownie or cupcake and top it with a mini peanut butter cup from Trader Joe's and I promise you will look like a rock star when it comes to dessert. I know peanut butter is a tough sell for some people but the frosting is so light and not overly peanuty with the cream cheese mixed in that even the non peanut lover will be won over to.


Wednesday, May 30, 2012

Oh Summer How I've Missed You So...

I know we are a few weeks off until that official day on the calender but thanks to that amazing weather all weekend, Memorial Day tends to feel like the "opening day" of Summer.  Those nice 3 day weekends do wonders for the body; you kick the intensity down a couple of notches, suck in that nice fresh summer air and mellow out because for 3 months it is all about relaxed, laid-back living.  During the rest of the year it always feels like you are up against some time crunch where you are rushing from thing to thing and never getting a chance to take a breather but then comes summer and the attitude completely changes.  Plans seems to fall into place because it's where the day takes you and you squeeze out every possible waking hour by eating later and lingering longer.  There are 3 other seasons to be all tight, perfect and in control...let your hair down and have Summer take you where it's meant to go.  Figure out what you want out of Summer this year and make the personal pledge to yourself that you are going to get everything you want out of it because it's right in front of you, full of promise for the taking.  


So in honor of the "opening day" of Summer, here are 2 amazingly easy recipes to enjoy all season long.  Let me highlight the beauty of the fast and easiness vibe to both of these dishes because as much as I love outdoor dining, grilling, and all of those wonderful Summer foods I hate having to be chained to a hot kitchen for long periods of time while I have far more enjoyable things to take part in.  First off, here is great new take on Classic Potato Salad made with eggs and pickles from my favorite blogger Dinner: A Love Story.  My calendar is marked for June 5th when their first cookbook comes out but Jenny and Andy among many others things know how to do Summer right so use their blog as a go to for meals all season.  They are the geniuses behind the Yogurt Marinated Grilled Chicken and I'm fully aware that I am mildly obsessed with them but more and more I feel like they could be my friends or neighbors with their "down to earth" take on food and entertaining.  The potato salad is a breeze to make and the combination of smashed potatoes, eggs and sweet pickles gives it a classic taste reminding you of something you've had a while back but couldn't quite replicate until now.  
Perfect summer kind of meal complete with a Narragansett 


These Brownies with Orange Cream Cheese Icing and Toasted Coconut should become your "go-to, do not pass go until you've made these" summer dessert whether it be for a picnic, get together or just a hankering for something sweet.  I actually made these brownies several years ago when the recipe was first published in Bon Appetit back in the summer of 2007 (and after a quick flip through the summer recipe binders realized that I still had the article carefully filed away) but became reacquainted with them this past Friday evening.  Like the good Connecticut residents that all of my friends and I am, we knew that we had to kick off the weekend at "The Place" which turned out to be a very fun evening filled with lots of laughs, wine and seafood.  We all brought different things and my friend Deanna volunteered to bring the dessert.  I love my friend Deanna dearly, we have literally been friends for about 90% of our lives and while she has many talents and attributes she isn't actually one to jump at the opportunity to bake so when she said she would bring dessert I was somewhat intrigued to see what was going to be the result of this move.  When the dessert was presented Friday night and I recognized what it was, I almost fell off my stump at the thought that Deanna went so far into the baking world that she had made her own homemade brownies but she actually did one better then that...she pretty much blew my mind with this trick that you all should adapt immediately.  Take your favorite store bought mix of brownies and prepare according to the package directions.  Mix into the batter a melted bar of 75% cacao chocolate until well incorporated and then continue along with the baking instructions on the back of the box.  Top with the homemade orange cream cheese icing from the link above and finish off with a healthy amount of toasted coconut.  By all means as I've said before "if you feel the need and desire to go all Martha Stewart on us please go ahead and make the homemade brownies" but can I assure you that people are not going to know the difference with this little trick.  And plus, you have far better uses of your time in these Summer months then to be slaving over brownies with 12 different ingredients in them.


Thursday, May 24, 2012

How to Succeed at Entertaining (without really trying)

I realized a couple of years ago that I'm actually quite a fan of graduation season that comes upon us every May and June and by no means do I need to be the one graduating to get into it.  I don't know if its all of those beaming graduates in shiny cap and gowns, the ceremonial pomp and circumstance of it all or just the underlying theme that a new chapter is beginning that is filled with so much promise and optimism.  Give me one of those inspiring commencement addresses or an up close and personal story about someone graduating and it's all over for me.  So as everyone is out there currently telling graduates to "carpe diem the day" and  "to go and set the world on fire" as my own Jesuit education always pushed me to do, I figured why pass up an opportunity to dispense some of my well learned and tried and true advice when it comes to entertaining.  There might not be a diploma or a fancy shamcy degree at the end of the post but I can assure you will be a better cook and hostess and that's a just as good skill to have.


1.) Keep the drinks simple 
In our house, we like to keep our alcoholic beverages of choice on the simple, straightforward side: wine, beer, gin and tonic, bourbon and water, vodka on the rocks with a twist.  I can assure you that we will never be serving up some fancy "mixologist" drink that has 12 different ingredients in it and involves bitters.  I know those drinks are all the rage, and there's a place and a time but we just aren't those kind of those people at home.  But sometimes the occasion calls for mixing it up a little bit (no pun intended) and you need a go to, jazzed up drink.  The beauty of this delight is that it can be served morning, noon or night (because in my book, it is always acceptable to indulge in a bubbly bev anytime) and involves minimal ingredients.  
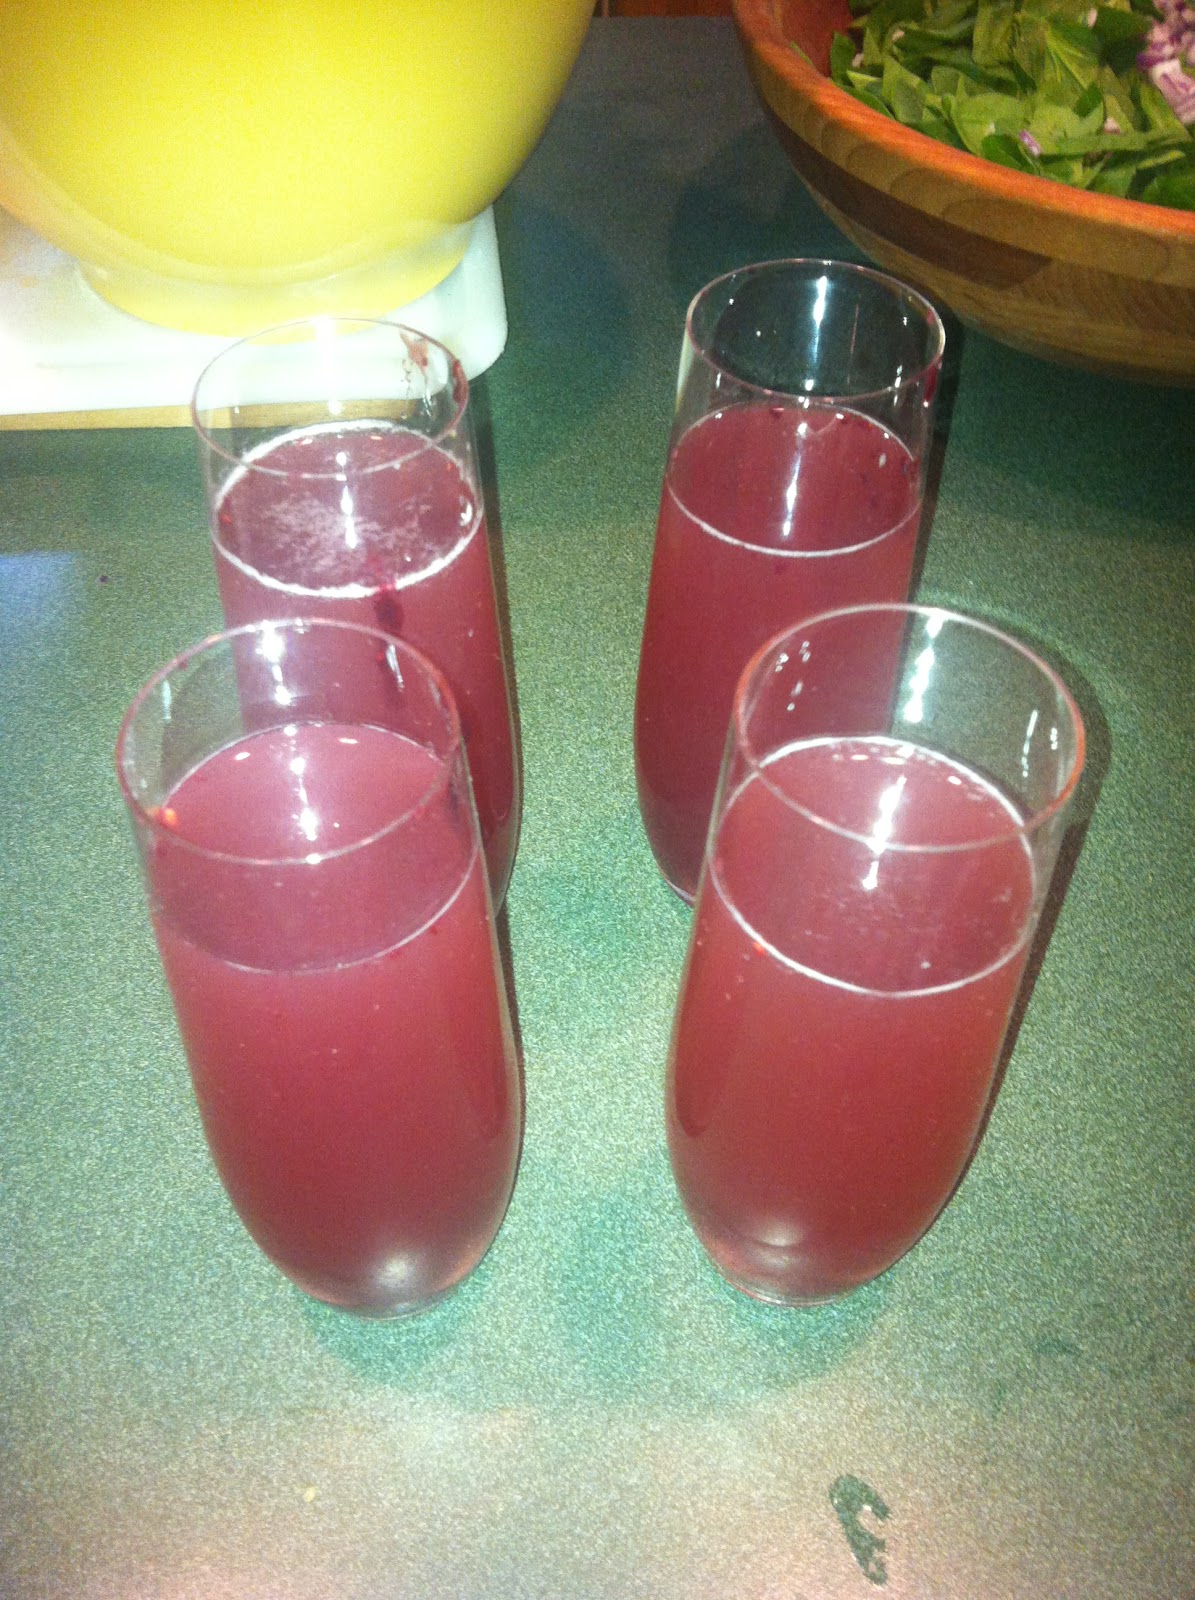
Black and Bubblies
In a champagne flute or wine glass, add a tablespoon of black current, or black raspberry puree (any berry on that note will do).  Add a splash of St. Germaine elderflower liquor to each one (which if you haven't had this already, you have no idea what you are missing...it's amazing on so many levels).  Fill the remainder of the glass with prosesco or cava (the Spanish cousin in the bubbly family) and give it a quick stir to mix all together.  And there you have it, that's all there is to this fabulous 30 second cocktail.  It's also a good starting point to an event that makes it easy to jump to something else such as wine later in the night because God knows we have all been there when we mixed the bar and it is never pretty nor enjoyable the next day.


2.)Appetizers should be a nibble not a meal
I happen to love appetizers and can make an entire meal out of them but I know their place on a full dinner menu.  They are a prelude, a quick snapshot or a tone-setter of what the meal holds.  Give your guests enough snacks to nibble on to hold their attention while everyone is settling in and then call it a day.  Because as I've said before "Do you really want your guests filling up on cheese and crackers when they really should be saving their appetites for the main event".  I usually either make one or 2 simple things that can be served at a variety of temperatures depending on when your guests arrive or follow this fail proof formula for a perfect appetizer platter:
-A fruit or vegetable (red pepper slices, peaches...think color but the sky is the limit).
-A cheese (most recently I went with a triple creme gouda that caught my eye at Trader Joe's but I always try to get something a little different that you wouldn't snack on during your average weeknight)
-A meat (very few people out there do not get excited when they see a fun cured meat or pork product whether it be salami, prosciutto, or something else in the pig family.  I happen to love either the plain sliced salami or pepper edged one from TJ's but if you are lucky enough to have a local Italian market, try whatever looks good and they always love to give you a sample!).
-A cracker or bread product (These have become my latest obsession but fresh bread ripped into pieces, or any interesting cracker will do.  Anything above the triscuit or cheez-it is a safe bet and I've found that the best finds are always in the cheese sections of stores).
-A dip or spread.  Depending on the season and if you are feeling ambition, you can pretty much make some sort of bruschetta or caponata out of so many vegetables or there are good store bought ones out there as well.  I happen to like hummus as well a lot and have a go to recipe for a hot buttered Israeli version that I love.  I was on my way to making that this past Saturday until I was browsing the dips at TJ's and saw something new on the shelf which was a white bean basil spread and thought "Oh I can make this just like I usually make my hummus" and an idea was born.  Out when the chickpeas, in went the cannelloni beans and we were off.  Here is the rundown:


Warm White Bean and Basil Spread (based on the TJ's version and Zahav Hummus)  


-Preheat your oven to 400 degrees. 
-In a small frying pan, melt 1 tablespoon of butter until foamy and then toss in 1 to 2 garlic cloves depending on size.  Saute until soft but watch to make sure they do not get too brown.  Set aside to cool slightly.  
-Into a food processor or mini prep, add 1 can of cannelloni beans (drained but reserve the liquid), 2 tablespoons of butter cut into small pieces, the juice of half a lemon (2 tablespoons),  the sauteed garlic and 1 tablespoon of tomato paste.  Puree until smooth and then add 3 tablespoons of extra virgin olive oil and a tablespoon or 2 of the reserved bean liquid if you think your spread needs it.  Continue to puree.  The whole key to success with this spread is to puree far longer then you would ever believe is necessary.  Just let the food processor run continuously for a couple of minutes and you will end up with the most smooth spread.  Season with salt and pepper and throw in a handful of fresh basil leaves.  Give it one more quick whirl to combine by the basil and you are good to go.
-Transfer the spread to an oven safe baking dish.  Top with a few pine nuts (if you have them around) and sprinkle of oregano and and swirl of olive oil. (You are basically going for aesthetics here so whatever you have in your kitchen to make it pretty is going to work out well...it's the garnish). 
-Bake for 15 -20 minutes until it begins to bubble on top and is warm throughout.


3.) Don't be afraid to change up the plan
There are times when I am a meticulous planner and list maker.  I am all about the "plan of attack" and executing it perfectly and then there are times where I really have no idea what I'm going to do until I'm in the middle of a grocery store and then you just have to go with your gut and what looks good.  This happened to me this past Saturday where all along I thought I was going to make roasted zucchini as my veg but then walked into Whole Foods in Fairfield (which can I just say blows the Milford one out of the water and is pretty much only 10 minutes further from my house) and got swept up by some beautiful skinny asparagus grown in New Jersey.   After taking a quick peak at the zucchini to see what my options were and discovered that it was grown in Mexico for only a dollar cheaper per pound  it became a no brainer what I was going to get.  Don't be afraid to not have a plan or abandon the  current one if it isn't working because we all know that the best thing in life are surprises and the unexpected always wins out.


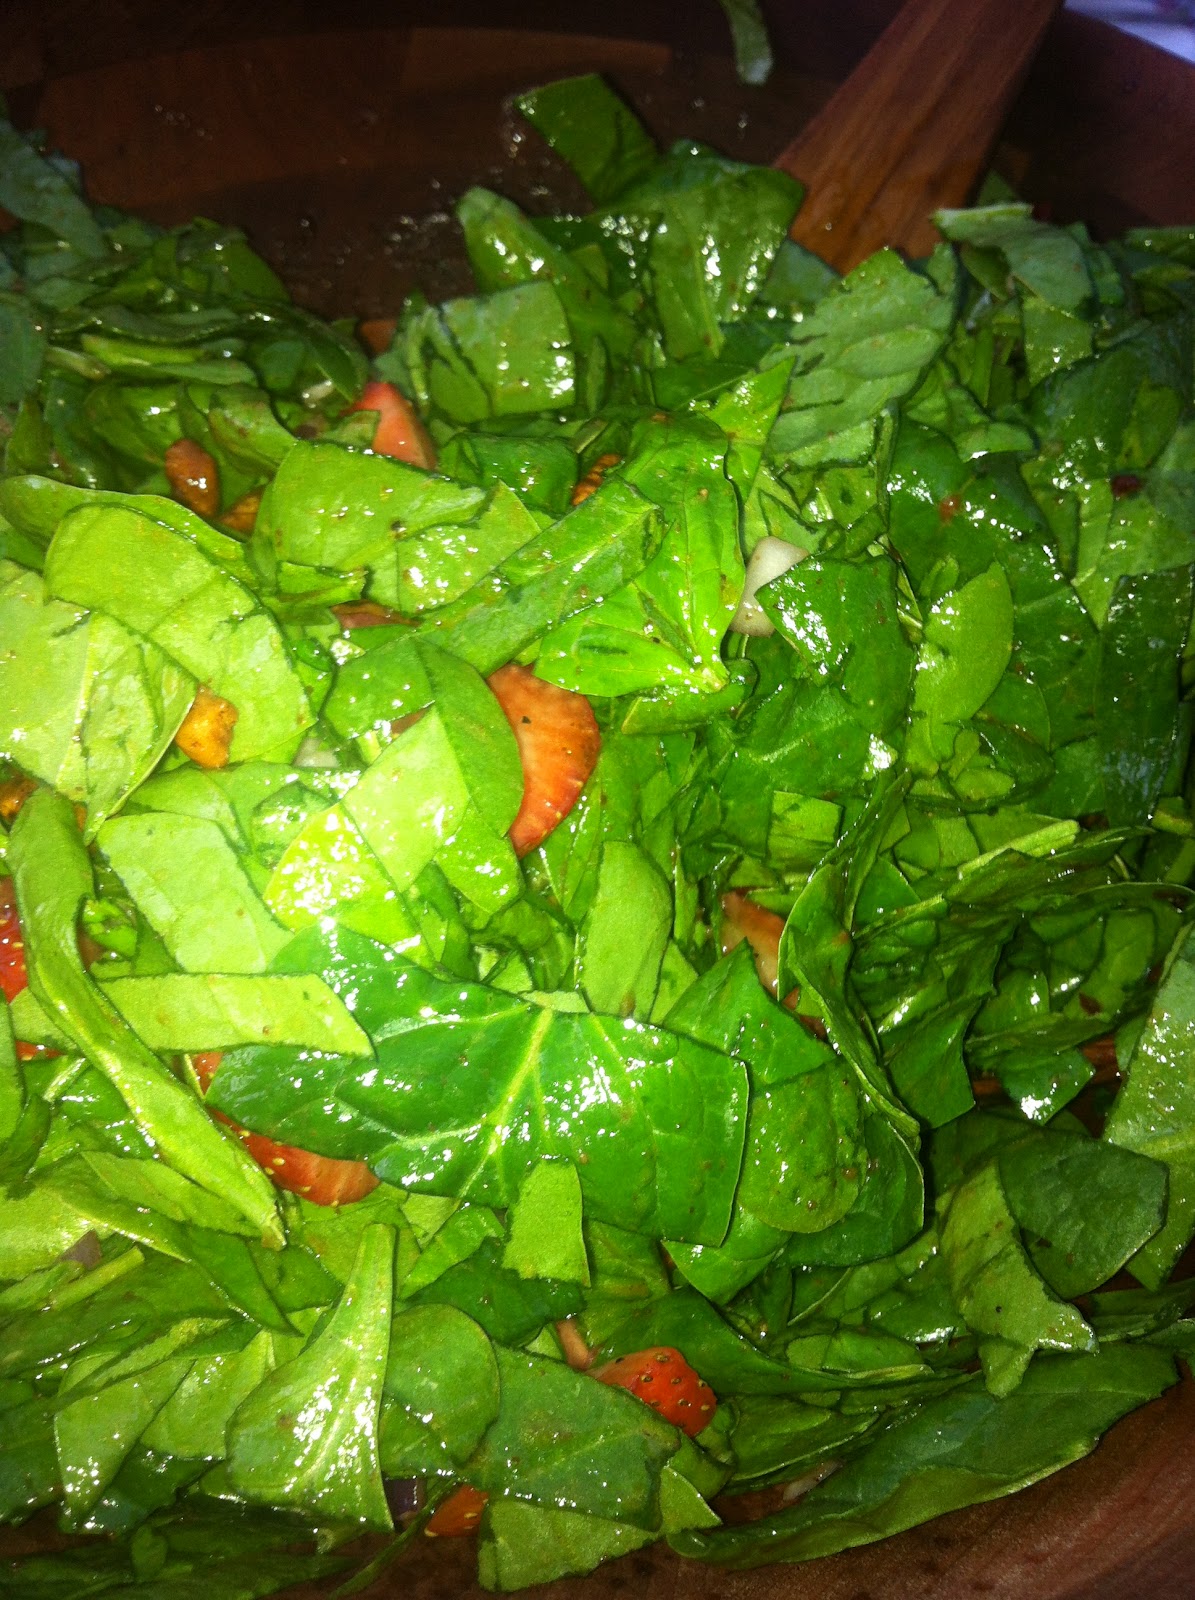
4.) Remember you are a guest at your dinner too 
So many times, people think they need to be short order cook when having guests over for dinner where they end up chained inside the kitchen while everyone else is having a good time and relaxing.  Above all else having a dinner party is mainly about your guests and the food secondary.  If you're with the right group of people, it really doesn't matter what you eat and almost anything will taste good when you are laughing so hard it feels like you're cleansed by the end of the night.  But because this is a food blog, I just can't leave you to your own devices so here is what will be my dinner party dish of the summer of 2012...the Candied Pork from one of my favorite blogs.  I made mine with skinny pork tenderloins that went on the grill instead of the oven and the only enhancement that I added was brining the pork overnight.  What can be better then a recipe that you brine overnight, make a simple marinade in the morning and then all that is left to do is grill up 30 minutes before you are ready to serve it?  The spinach salad that accompanies the pork recipe is also amazing and with a few candied pecans thrown in it's the perfect dinner party salad.