Wednesday, July 27, 2011

CSA week 8: Part 1: The corn has arrived!

Here is what we took out of our full share this week:

-1 head of cabbage
-3 lbs of yellow squash and zucchini
-1/2 lb beans (yellow)
-1 greenhouse cucumber
-1 lb pickling cucumbers
-1 bunch of swiss chard
-1/2lb bag of leaf lettuce mix
-1 bunch curly kale
-8 ears of sweet corn

I'm going to dive right in because we have had quite the busy CSA week and good things are still to come!  The way I'm going to do this week is actually break it into a few posts so you don't feel like you are reading a novel and that way there is more to enjoy.  I was home for a few days to recharge and beat the heat in Connecticut so on Saturday night, we had a few people over for dinner and I made one of my favorite meals: shrimp tacos, black beans and rice, a creamy cilantro slaw, and did a quick pan saute on the corn.  This was the first corn of the season that I had from the farm because I personally hate buying corn from the grocery store and the flavors were so amazing that it was worth the wait.  In the past we were always believers in the method of just boiling the corn and then eating it right off the cob and I had many happy corn filled summers like this.  But I was looking to try something new so here is the run down of the corn and this is going to be the preferred method of cooking this summer because its so easy.
-Cut the kernels off the cob using a sharp knife or a corn zipper (I should probably be an advocate of the corn zipper but if you are confident with your knife skills then go for it).  See the picture below for the technique that you want to follow when cutting.  It always helps to have a flat surface so that way your corn cob isn't tilting all over the place.  There is no other way around this but you are going to have corn kernels flying all over your counter when you are cutting them off.  It's just the nature of the game and I promise that it's worth the cleanup.

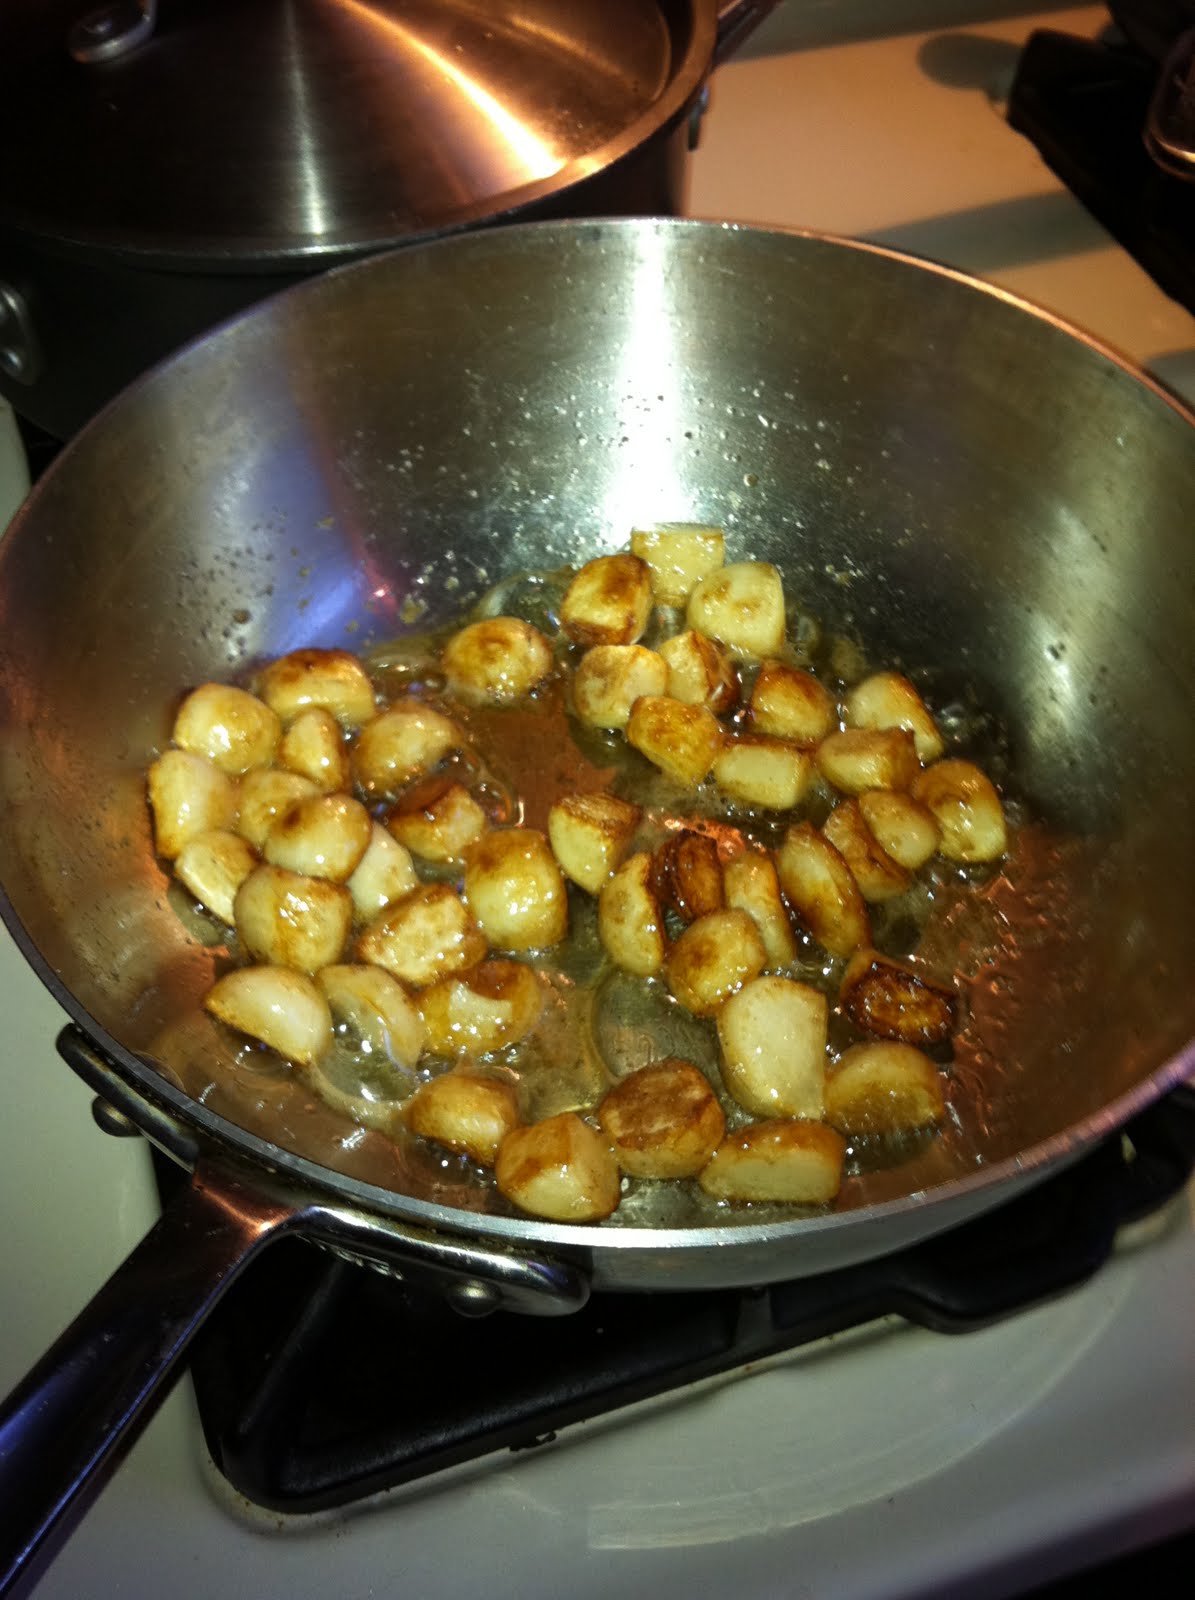
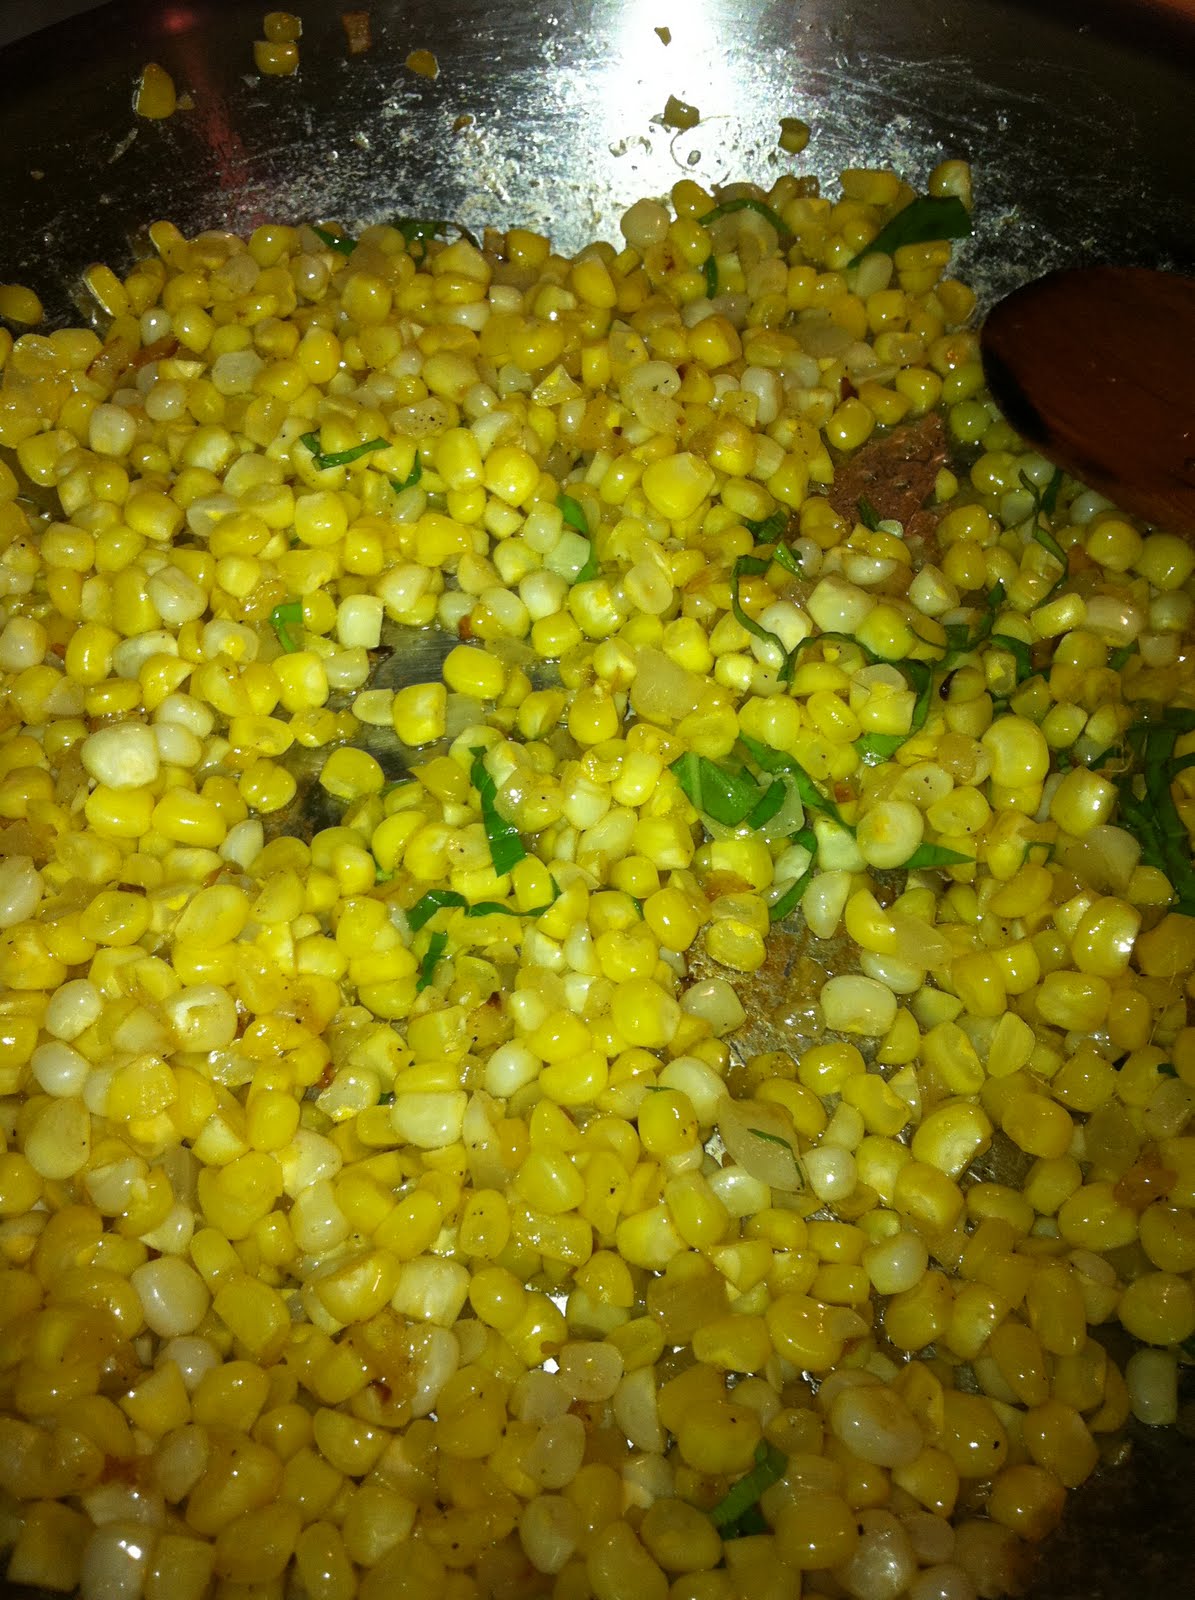
-Heat a few tablespoons of butter in a large frying pan until melted.  Toss in some chopped up onion and a few cloves of garlic and saute for a few minutes until it starts to get translucent.  Toss in your corn kernels and let saute for another few minutes, giving it a stir every once and while making sure it all gets coated in the butter.  Once your corn is tender but still have a nice bite, finish it off with salt and pepper and throw in a few leaves of chopped up basil.  


Tonight I was feeling a bowl of pasta so after a quick inventory check of the fridge this is what I came up with:
Spaghetti with bacon and squash
-Heat your large frying pan (if you haven't figured it out yet, one of my go to pans is a 12inch fry pan of a 4quart saute pan because they are so multi-purpose) until hot and toss in 4 slices of bacon that you chopped up into a 1/2 inch dice.  Once this starts to brown, toss in 1 cup of squash (I used a combination of zucchini and yellow squash) that you have cut into 2 inch long matchsticks, and 2 cloves of chopped up garlic. 
-Let this all cook together for a few minutes, then add 2 tablespoons of butter and about 1/4 cup of heavy cream and continue to cook until your sauce starts to thicken up.  
-Meanwhile have your pasta cooking next to the frying pan (I used a 1/2 pound of spaghetti) and steal a ladle full (or 1/4 cup) or the starchy pasta water to add to your frying pan to help your sauce along.  The pasta water tip has truly revolutionalized the way I cook pasta and this simple step makes such a huge difference.  
-Once your pasta is ready, toss it into the frying pan giving everything a good coat.  Finish the pasta off with salt, pepper and a few tablespoons of parmesan cheese.   


Sunday, July 24, 2011

CSA Week 7: The Zucchini Circle

So I fully admit that I have gotten a little behind schedule with blogging about our CSA life but here is the recap of what came in our box for week 7.  We have actually upgraded to a full share for the rest of the season because we had a friend that was interested in joining and it works out great because you get more then double the contents.  This is what we took home out of the share:

-2 lbs new red potatoes
-1 bunch early onions
-2 bunches of beets
-4 lbs yellow squash and zucchini
-1 greenhouse cucumbers
-1/2 lb  leaf lettuce mix
-2 bunches of radishes
-2 bunches of hakurei turnips
-1 bunch of toscano kale

Monday night was our smorgasbord vegetable dinner night where we used up a lot of our veggies to go along with the pork tenderloins that I did on the grill.  We roasted up the new baby potatoes with butter, olive oil, salt and pepper and finished them off with some fresh rosemary from the herb pots.  They had a delicious, earthy flavor and don't need to be "over-prepared" in some fancy recipe.  We had a bunch of broccoli from last week that we cooked up, and then sauteed up another batch of the hakurei turnips like I have been doing all season. 
Being mindful of last week's kale debacle, I picked a night that only I was eating (or so I thought) and made a new version of a kale pasta dish (yes, I'm still fully invested in the kale).  This week we had the toscano kale which is a little bit of a different variety then the curly kale that we have had all season since the leaves are larger and flatter (more like a collard) and have a dark green hue to them.  They sauteed up really nicely and I tossed them with some sweet Italian sausage, garlic, olive oil, white wine and some umami paste (an upgraded tomato paste that has become my new obsession).   In went the pasta and a small handful of Parmesan cheese and I had a dinner that I really enjoyed.  The next day I came to discover as I was looking for the leftovers, Andrew also happened to like this version as well since there was hardly any left and now we just have to get my mother on board for this and we can have another enjoyable kale dinner .  

As I said last week, all of the August food magazines have arrived in our house and they are all chock full of fantastic summer recipes that involve lots of farm stand produce.  If you know anything about me, you'll know that I have been a faithful reader of  the big food magazines such as Bon Appetit, Gourmet and Food and Wine for years and actually have quite the cataloging system in order to save all of the back issues.  The magazines and I had been in a rut lately ever since Gourmet closed at the end of 2009 (which I still haven't gotten over) and then I felt like B.A. had gone stale but my hope has been renewed ever since Adam Rapoport took over as B.A.'s new editor in chief and it feels like a completely different, exciting, new magazine.  I have made so many things out of the magazine over the past few months, the point of view is hip, relaxed and refreshing and I encourage you to pick up an issue if you haven't read through one lately so you can have the same success.  And how can you not be excited for an August issue when the last line of the editor's letter reads as this: "Because eating local isn't just about some political statement, it's about good taste".  

Here is one of my favorite's from the August issues that I know is going to become one of my instant summer classics - Zucchini Ricotta Fritters.  I'm not usually drawn to Mario Batali recipes but the picture of these guys sucked me in to try them in the first place and after one bite I was hooked.  They were super easy to make and would either be a great mini appetizer or a perfect light summer supper with a green salad on the side.  Usually zucchini becomes the hindrance of the garden because you get so much of it but I can not wait to make these again next week when the new round of it arrives.  And since our friend Maria stopped over Thursday night when I was cooking up the fritters, it reminded me of a blog post of hers last summer when she talked about the zucchini quiche recipe that my mother passed along to her more then a decade ago which is another easy summer recipe.  It's all one big culinary circle!!    


Zucchini-Ricotta Fritters. Photo © Antonis Achilleos

Wednesday, July 20, 2011

I've become that "earthy crunchy" kind of girl

7 weeks into the summer of the CSA and I finally took the plunge Monday night and made the kale chipsWe have gotten an over abundance of kale so far and as Andrew told me earlier, it's going to keep coming all summer.  Before this summer, I had never had kale before on a regular basis, always thought it was quite the hippie vegetable but I've done a pretty damn good job in embracing the leafy greens and making them a variety of different ways.  Regardless of what the food is though you are bound to hit the point of no return whenever you are eating something on such a consistent basis and we hit that wall quite hard last week.  I made the pasta with the tomato sauce, ricotta and kale like I did a few weeks ago and maybe because it was 9:45 when dinner finally made it on the table and I was ready to eat my arm off since I was so hungry that I was ok with the dish but my mother and Andrew were not feeling it at all.  I spent my dinner listening to comments of "the kale is too big" and "there is so much kale" that I was just like pick it out but I knew I was going to have to ease up on the onslaught of kale that I have been pushing on my family. 

So here is where the kale chips come into play.  Everyone who I know that has had them absolutely loves them and has told me what a breeze they are to make and that you will use up a lot of the kale in the process.  Stacia from Stone Gardens included a recipe for them in our weekly email and they really were so simple to make. 
-Preheat your oven to 375 degrees. 
-Pull the kale leaves off of the stalky middle and rip into 2-3 inch pieces.  Give them a quick spin through the salad spinner and then toss them with 2 tablespoons of olive oil and a tablespoon of apple cider vinegar and arrange onto a cookie sheet in a single layer.  Sprinkle the kale leaves with Parmesan and salt.
-Pop in the oven and bake for 15-20 minutes until the leaves crisp up and start to brown on the ends. 

nice and crisp right out of the oven

Maybe it was because I was starving again from just coming from a zumba class but they were really good.  So good that the next day I proceeded to inhale the whole bag of them when I was at work on a conference call and a hell of a lot healthier then the potato chip binge that we sometimes like to go through in our house.  Now I'm looking forward to the next batch of kale that is coming to do this again. 

Tuesday, July 19, 2011

CSA Week 6: Bringing home a Philadelphia classic

Here is what came in this week's box:
-1 bunch of baby beets and greens
-2 bunches of collards
-1 bunches of kale
-1 bag of broccoli crowns
-1 head of romaine lettuce
-1 head of red leaf lettuce
-1 1/2 lbs yellow squash and zucchini
-1 greenhouse cucumber
-2 kohlrabi, purple or green
-1 bunch of hakurei turnips
-1 2 inch chive plant

We are at the 6 week mark of our CSA farm share and I have been really enjoying it so far.  I feel like because of it, we have been eating a lot healthier and also not going to the grocery store as much (which is great considering I used to feel like I would go shopping 3 times a week).  Once I get the box home, I always like to take inventory and do a quick initial trim/prep on the veggies and get them into plastic bags and containers so that way when I'm ready to cook, I've already saved myself a few minutes with my prep work.  The veggies also last a lot longer with the initial prep time so by taking a few minutes, I'm extending the freshness of everything.  I do have to admit that I feel like a borderline slacker this week because we do have a few things left over but they still look good so I will incorporate them into next week's dinners.  All of the lettuces went to salads as usual and I'm going to really miss them since we are coming to the end of the lettuce season and being as salad has become one of my main food groups, I'm going to have to change it up very soon.   Monday night, I made a zucchini cornbread from the July issue of Bon Appetit which was good but if you make it I would recommend serving it with a honey butter to give it a little bit more sweetness.  It seems like zucchini is on everyone's mind being as all the August magazines came this week (Dutch, the mailman must want to scream some weeks because we do a big part in keeping the magazine world still in business)  and they all have these great recipes for zucchini which I can't wait to try out.  The beets got a simple foil roast in the oven with just salt, pepper and olive oil and they were so delicious that you could eat them like that but I tossed mine into my salad one day for lunch. 


The thing that I was the most excited for this week was the new addition of the collard greens to the box because I had never cooked with them before but was excited to break out my Lee Brother's Southern cookbook for some helpful hints on cleaning and cooking them.  My real inspiration though for them came from my brother's co-worker Zep who told him how to cook them Italian style with garlic, pancetta and white wine (really what could be bad when you add those 3 things to any dish).  Here is the quick recipe for the Zep Collards:
-Cut the collard leaves away from the stalky middle part and give them a good rinse.  Cut them up pretty finely so they will cook up pretty quickly.  I layered a bunch of the leaves together, rolled them up like a cigar and chopped them up that way and it worked great.
-In a large saute pan,  heat a few tablespoons of oil, and toss in a quarter of a pound of chopped pancetta and let saute until it releases some fat and begins to get crisp.  Throw in a handful of chopped up garlic (I used a good 5-6 cloves)  and let cook until it becomes soft.  Toss in half of your collard greens and let cook for a few moments until they start to shrink down.  Once this happens, toss in the rest of the leaves and pour a good glug of white wine into the pan (a 1/4 cup is good) and let cook until almost all of the liquid is evaporated. 
-When the leaves are nice and tender, season with salt and a small pinch of crushed red pepper and finish them off with a drizzle of balsamic. 
somewhat intimidating when they are are coming at you like this straight from the box

You can enjoy the collards just like this or you can take it one step further like I happened to do.  It just so happened that it was the weekend of the St. Mary's festival and we had some leftover porchetta in the house.  I was thinking of ways to re-do my leftovers and the idea to replicate one of my favorite Philadelphia delicacies came to me and I knew this was going to be good.  The cheesesteak is symbolic with Philadelphia but it's so much more of a culinary city then that.  They have amazing restaurants (which many of them at BYOB!), some of the best gelato you will ever have from Capogiro,  and an Italian market which is so much fun to shop at on weekends.  Don't get me wrong, the cheesesteaks are good and I've ate my fair share of them going to college in Philly but the real deal sandwich is what you can get at DiNic's at the Redding Terminal Market.  DiNic's makes this fabulous roast pork sandwich which they serve on a Philadelphia hoagie roll (for all of the New Englanders out there: we can call it a grinder roll) and then top it with sharp provolone chunks and sauteed broccoli rabe...It is amazing because all the flavors blend into each other and you just sit there at the counter eating and watching all of the activity of the market.  Maybe I'm bias but I would put it up against a Geno's or Jim's cheesesteak any day because it's just such a different flavor. 


DiNic's roast pork sandwich valley style

So I might not be in Philadelphia but I knew I could make the "valley version" of this sandwich and it was a pretty good stand in.  Here is the sandwich lineup:  what else to put it on but a Altimari's Portuguese roll, the porchetta from Saint Mary's church and the "zep collards" which came from Stone Gardens.  This might only be a once a year occurrence since you have to wait for when the porchetta is available but who knows, I might be assembling my sandwich next year at the back of the booth. 

Thursday, July 14, 2011

Happy Bastille Day

Being as it is July 14th, I had to take a moment to wish everyone but especially my cousin Aaron a happy Bastille Day!!!  For those of you that don't know, Aaron is my partner in all crazy things, the other half of my brain because we think so much alike and as my mother once dubbed us "you and that one".  Aaron threw a Bastille Day dinner party for the first time 5 or 6 years ago where he served coq au vin for all of his friends and the tradition has stuck.  I've been along for the ride for 4 of those crazy, insanity filled Bastille Day dinner parties and they have truly been some of the best parties that I've ever thrown or even been at. Each year has taught me so much about the way I cook and entertain and the memories that I have from each of them are so priceless.  Some would say that after my first year of cooking in the hot, non-air conditioned sweat box in Atlanta where we had the brilliant idea that we could pull off crepes for 30 I would have been scarred for life but each year we would dive further into channeling our inner Julia Child and throwing a fabulous party.  Some years we would change up different elements of the menu and the party now takes place in Philadelphia where Aaron lives but as long as we have lots of wine and a bunch of people around, you are bound to have an amazing time. This year life got in the way and we are taking a hiatus from our Bastille Day dinner party but I know next year we will be back on the bike of the party (I had to throw a tour de France reference in there).  

I couldn't let Bastille day pass without any fanfare so I whipped up a roasted tomato tart before I went to work today.  The first time I had this tart, Aaron and I were at this great French restaurant in Philadelphia and the tart was so delicious that I started badgering the waitress for the recipe because I knew this was something that I wanted to make myself.  She set me up for success with what was in the tart and then I kind of ran with my own imagination.  I usually make bite-sized ones to serve at a dinner party but today I made a large one and it came out great.  Here is the recipe so you too can have a little bit of France in your life.  

Roasted Tomato Tart

In a small saute pan throw in 2 pints of grape tomatoes, a few gulgs of olive oil, 2-3 cloves of chopped up garlic, a quick drizzle of good balsamic, and salt and pepper.  Let it saute for a good 10 minutes, stirring once in and a while so that the tomatoes start to break down.  After another few minutes, mix in a tablespoon of tomato paste to help thicken the filling and continue to let it cook until most of the tomatoes have burst or are soft.  At the end, stir in a few tablespoons of chopped up basil along with 2-3 tablespoons of goat cheese.  Right here you can stop and just enjoy the tomato mixture like it is as a warm bruschetta with a big baguette or you can continue with the tart.  

Preheat your oven to 400 degrees.  Roll out one sheet of puff pastry into a 9 inch circle and place into a pie dish.  Prick the puff pastry all over with a fork so it doesn't puff up and bake in the oven for about 15 minutes.  Usually my puff pastry still puffs up but I just push it back down with the back of a spoon.  Spoon your filling into the pie dish over the pastry and bake for another 15-20 minutes until your tart has set up.  Serve warm with a simple green salad on the side.         

Monday, July 11, 2011

So the family is coming for lunch...

I had a great weekend spending time with my family since my cousins were in town from California and Philadelphia and it was a lot of fun to hang out and catch up.  Friday night, we hit up Modern in New Haven for pizza so the California crew could get their NH pizza fix for the year and I don't know if it was because I hadn't been there in a while but it was especially a good round of pies and we literally took no prisoners as we all devoured it up!

Today I decided to have everyone over for lunch before people headed out and what better way to enjoy a Sunday in July but with a lunch of all the summer classics on the deck with 13 of us.  Here is the menu run down and I've included links or references to most of the items: 
  •  Yogurt marinated cilantro chicken (I don't like to repeat recipes so quickly but when you found a good one, take advantage of it!  We christened our chimney starter today as well and it makes such a difference...strong work Andrew with setting everything up) 
  • Dry rubbed baby back ribs 
  • Potato Salad
  • Coleslaw (with my CSA cabbage) 
  • Corn and Roasted Red Pepper Salad 
  • Orzo with Spinach and Grape Tomatoes (I feel like I have to put a disclaimer on this one: This is actually a Rachael Ray recipe and I for one find her extremely annoying and refuse to buy into all of her 30 minute meal and "evoo" BS but I had this salad at someone else's house a few years ago and absolutely love it!  I add a good amount of Parmesan cheese to mine and it always comes out so good.)   
  • Tossed Green Salad with Grilled Watermelon and Pignoli Nuts. 
  • the charcoal grill in action
    "If I ate meat, I would eat this chicken" - from my cousin Allison, a vegetarian
    the lunch buffet
Everything came out really good and the lack of leftovers was a sure sign of how much everyone enjoyed lunch.  But really what's the most important part of a meal especially when you are polling the "under 10" crowd but the dessert of course and I knew that homemade ice creams and a big plate of cookies would be a sure winner for a hot summer day.  My cousin Jane informed me on Friday that her favorite flavor was cookies and cream so obviously that is what she got which was easy to make just by crushing some oreos into my homemade vanilla ice cream base.  Vanilla also made an appearance and then I was lucky enough to get another delivery of black raspberries from Maria (I'm starting to think this is a perfect world scenario having fresh picked fruit dropped off at your house on a regular basis) so they got pureed and mixed into the ice cream base for an amazing new flavor.  I know I've made my fair share of good flavors in my ice cream career but I think the black raspberry really takes the award because it was so fresh and summer tasting and the color was this awesome vibrant shade of magenta!!!  In a last minute find, my Mom pulled out these vintage plastic ice cream bowls that were circa 1990 from our cabinet which is somewhat ironic because my mother isn't a saver in the least bit but they added to the excitement for the girls as they picked which color bowl each of them would have along with which flavor of ice cream would occupy the girls.  I on the other hand love to eat my ice cream  "chipwich" style as in slapping a big scoop of ice cream between 2 fresh baked cookies but anyway it goes down, its going to be good. 

"chipwich style"


The Rak girls and I


Sunday, July 10, 2011

Picnic leftovers re-made

So we have all hosted a party before where you make too much food and then have a fridge full of leftovers.  Sometimes you are able to pawn off some of the leftovers on your guests that they can enjoy but usually you eat the leftovers for a day or two as they were made originally and then you get to the point where they are the last thing you even want to think about after eating the same thing for 3 straight days.  By this point if things are still leftover they make their way into the trash and I'm sure if you are anything like me, you have a pinge of guilt that you are throwing away food.  Well here is my challenge to you this summer so we all don't hit the point of no return with our leftovers - get creative and make them into a different meal for everyone to enjoy.  Sneaky yes, but I assure you that people will be much happier to see a new and improved version disguised at the dinner table then the same boring thing.  Here is the first dish that kicked off the challenge for me and it actually comes from Noah and Suzanne's leftovers of food that they had at their 4th of July party.   

Corn, Roasted Pepper and Tomato Salad

Obviously your measurements will depend on how much you have leftover but here is some general direction to follow.  Also don't think you are limited to make this only if you have leftovers...it would make a great first run side dish as well.

-Cut the cooked corn kernels off of the cob and toss them into a large bowl.  (If you don't have leftover corn I highly recommend the frozen charred corn from Trader Joe's.  It is one of my favorite things that they sell and is so much better then the regular frozen run of the mill stuff). 
-Chop the roasted peppers up into a fine dice and add them to the bowl (I like to make my mother very nervous by roasting them right on the burners of the stove but a jar of the store bought peppers work well too).   
-Same goes for the leftover tomato and mozzarella salad that you served as a first course.  Chop up the tomatoes and mozzarella to a similar size as the rest of your ingredients and into the bowl they go.  
-If the tomatoes were already dressed with olive oil then you really have to add minimal oil but if not add a tablespoon or 2 of olive oil to the salad along with the same amount of balsamic vinegar.  Finish it off with some salt and pepper and a quick chiffonade of basil and give everything a stir and the leftovers are remade into an exciting new dish.  


the rest of the dinner was pretty damm good as well
And as you'll see in the next post...I couldn't wait for the leftovers and made my own fresh version of the salad!  Thanks Noah and Suz for being creative


Thursday, July 7, 2011

CSA Week 5: Residing in the Cabbage Patch

Here is what came in the box this week:
-1 greenhouse cucumber
-1 zucchini
-1 bunch of radishes
-2 kohlrabi
-2 heads of cabbage
-1 large bok choy
-1 head of red leaf lettuce
-1 head of romaine lettuce
-1 bunch of curly kale
-1 bunch of beet greens

We are now starting to get into the classic farm stand veggies between the zucchini and cucumbers but are still living in the land of leafy greens for another couple of weeks.  Salads are in full effect in our house and I'm sure that we are really going to miss the lettuce once it's gone.  I actually gave away the beet greens and kohlrabi bulbs to a friend of ours because I knew it was going to be a busy week and I figured let them go to good use in someone elses kitchen instead of going to waste.  We are starting to hit the limit with the bok choy since every week we have been getting these huge stalks that are really good but come on, how much bok choy can you really consume so I knew I was going to have to get creative on this one.  I was browsing through my recipe binders that I keep and I came across Hazel Sy's recipes for the Pork and Cabbage Pan Fried Dumplings (scroll down to the bottom of the link for the recipe) that I had made back in the winter that were really good and pretty easy to make.  Instead of using the napa cabbage that the recipe called for, I used chopped up bok choy instead and the substitution worked perfectly.  Hazel gives you a helpful YouTube video as well on her blog demonstrating how to put the dumplings all together and after 2 attempts at the dumplings, I've learned that my brother Andrew has much more of a knack for folding the dumplings then I do so he came in very handy during the Yankee's rain delay on Sunday.  Once we were finished stuffing and folding the dumplings we made a bunch of them to have for lunch and then froze the rest of them for another meal to have later on.  This is a good project to tackle when you have a few hour time block in your kitchen and it is always easier to do when you have a few people around so it's a good weekend activity when your friends and family are over so that way you can set it up assembly style and everyone can get in on the action.   We bought our dumpling wrappers at the Asian grocery on Whitney Avenue in New Haven which has a great selection of Asian sauces and pantry staples but if you are in a bind and don't have time to take foodie field trips like we do, you can also use wonton wrappers from the grocery store.  Here are a few pics showing the filling process along the way as well as the finished product.

filling goes into the center of the dumpling

fold the dumpling in half so all of the sides meet

fold the ends of the dumplings in into a triangle (this is where things started to get dicey for me)

fold the triangle ends over to the sides to seal everything up

ready to be cooked or frozen

the finished product about to be consumed

Tuesday, July 5, 2011

Happy belated 4th of July (and a preview of what's to come...)

Hope everyone had a fantastic 4th of July weekend!  With Monday being the holiday, it was nice to have the weekend to celebrate and it was a pretty jammed packed one.  I'm a girl who loves All-American holidays whether it's Thanksgiving, Election Day (when you have a degree in Poli Sci you count this as a holiday!!!) and most importantly 4th of July so I was pretty jazzed to kick back and celebrate.  I've spent the 4th in memorable places all over the east coast whether we were at the Cape, on a Navy ship watching fireworks in the middle of Hudson River in NYC or enjoying a gin and tonic out of a nalgene bottle on the Capital lawn.  This year we went local and started off the 4th of July festivities on Sunday night at the Garofalo's beach house in Milford where you have a prime view of the fireworks that people shoot off over Deerfield Beach that are always spectacular.  Even though it wasn't the most All-American menu, Marc served up homemade pizzas on the grill that were so phenomenal that you didn't miss the classic picnic fare at all.  I have to say this...I've made homemade pizzas on the grill before but Marc's whole operation in doing his makes me look like a complete amateur between the array of toppings that go on, the different combinations that he comes up with, and just the pure business that he goes about in doing it where before you know it there have been 20 pizzas whipped up in no time where I on the other hand would have been lying under the grill in absolute exhaustion.  I'm totally inspired to now to have a large grilled pizza party later in the summer at my own house but here are some pics from the evening to get you hungry:

a small section of the toppings line-up

Sunday, July 3, 2011

Upping my grill game

Friday night, I hung out with my friends Deanna and Suzanne and we cooked up quite the outdoor meal.  We all had a very long week, hadn't really had the opportunity to get together and just hang out all month because we had all been busy so I was looking forward to just being able to sit, relax for a few hours, and drink some much needed wine with my friends.  Suzanne hosted us this time on her deck (which by the way: I have to give you and Noah a lot of props for all of the fabulous yard work you have done this year...it looks amazing!!!) but was just getting back from a business trip the day before so instead of having to order take-out, I jumped at the opportunity to pull out a few recipes off of my summer wish list that I have been dying to make and said that I would take care of the cooking.  Deanna volunteered to make the dessert, Suzanne supplied us with the wine and we were ready to dine alfresco.  Let me just say, its also a very beautiful thing when your friends also double as your neighbors because Suzanne happens to live within spitting distance from my own house so the quick jaunt up and down the hill simplifies things even more.  

On the menu was Yogurt-Marinated Grilled Chicken and an Orzo with Everything Salad that my cousin Allison made for us last year when we were in California which is super easy to throw together and a great side dish to almost any grilled meat.  The chicken marinade was really easy to throw together since you literally just dump all of the ingredients into the food processor, blend them all together and then it gets poured over the chicken in a large ziploc bag so there is no mess later on.  Do not be intimidated by the large number of ingredients in the marinade.  A lot of the ingredients I had lying around my kitchen so there was minimal things I actually had to go out and buy.  You can also make a double batch and then have it in the fridge ready to go for another quick weeknight meal when you don't have an extra 30 minutes to play with your food processor on a Tuesday morning when you are trying to race out the door to work.  The orzo salad can also be assembled beforehand as well and actually tastes better when it gets to sit for a few hours where all of the flavors have an opportunity to mesh together and really play off of each other.  

Friday, July 1, 2011

CSA week 4

This is our fourth week on the CSA and here is what came in the box:
-1 bunch green onions
-1 bunch radishes
-1 bunch hakurei turnips
-2/3 lb bag of baby leaf lettuce mix (There was a choice between this and Asian mix.  After 3 weeks of the Asian mix, I was happy to take a break and consume some more lettuce)
-1 head of butter leaf lettuce
-1 large Bok Choy
-2 bunches curly kale
-1 small bag of sugar snap peas
-1 2inch parsley plant


Ok, let me start off by saying these bunches of green onions that you get in the box are NOT your grocery store scallions by any means.  They are massive and if green onions could be on steroids, these would be it.  Imagine seeing a 2-3 foot spiky palm perennial in your backyard and that would be a pretty good description of the onions at first glance.  Needless to say we are still going through the bunch from week 3 so we haven't even touched week 4 yet and I'm going to have to get creative very quickly.  Can you actually freeze green onions for future use (or would that be one of those ideas that turns into a forgotten treasure in the back of the freezer 8 months down the road?)  If you live close and are need of some green onions, don't you dare go buy them...I will be more then happy to share! 


The hakurei turnips were the gem of this weeks box.  I hoarded my bunch from week 3 and cooked them along with the week 4 bunch and they were so good!!!!  If you are at a farmer's market or happen to to stumble upon them at a speciality grocery store, buy them up immediately.  All I did was cut off the green leaves, trim the bulbs up and quarter or half them depending on size.  In a small saute pan, melt a few tablespoons of butter and toss the cut up turnips in.  Let them saute until soft and starting to brown in spots (about 10-15 minutes) and then sprinkle a teaspoon or two of sugar on top and let them caramelize in the pan for a few minutes longer.  Super easy and so delish (so much so they I actually bought another bunch on Wednesday at the New Haven farmer's market. 


We had another batch of stir fry one night for dinner that I used some of the bok choy, snap peas, and green onions in and this is fast becoming one of our go to summer meals.  Another night's dinner was a big salad with rotisserie chicken which we all love as well and I used one of the bunches of kale on the quiche I made in week 2 that was for lunches.  Finally, Tuesday nights dinner was a big winner across the board and another great way to use the kale in a very easy pasta dish.  I'm sure at this point, you must be saying to yourself "How the hell does this girl whip up these ridiculous, gourmet sounding meals most nights after coming home from working in New York City all day?" but I promise this literally took 25 minutes start to finish from walking in the door.

Rigatoni with Sauteed Kale and Ricotta
-Boil the pasta. (Look I'm not giving instructions on how to boil pasta, plain and simple.  You can handle it.)
-In a large frying pan, saute torn up pieces of kale with a few gulgs of olive oil until wilted or tender.  Season with salt and pepper. If kale isn't going to happen in your kitchen, throw in spinach instead but give it a shot.  To save even more time, this is one of those steps that can be done when you have a free 15 minutes during another point in the week and the sauteed kale can also be used on pizza, quesadillas, eggs or just be itself as a colorful green addition to your plate.   
-Once the kale is ready to go, add a few cups of your favorite tomato sauce to the pan and let cook on low for a few minutes until heated throughout.  Toss the cooked pasta into the pan with the sauce and let everything cook together for a minute or two until all of the flavors blend and the pasta is evenly coated. 
-Finish the pasta off with a few tablespoons of fresh ricotta and some chopped up fresh basil and dinner is on the table. 

 
If you are looking to inundate your diet with kale like I have, here is a another easy recipe for a kale and white bean soup that my fellow CSA-er Maria shared with me as well that was really good.