Saturday, September 8, 2012

How to Monogram a Cookie


For all of those monogrammed obsessed individuals out there just like me here is another thing to add to the favorites list that includes Anthropologie "Letter" mugs and LL Bean boat and totes...The Shortbread Rhubarb Sandwich Cookie aka the "Initial Cookies".


 *Note:
-The jam recipe that goes along with the recipe is fantastic but if you aren't into making your own fillings, don't let it be a deal breaker for not making the cookie recipe.  Any good quality jam is a good stand in for a cookie filling.  I would just recommend pureeing the jam in a mini prep for a couple seconds to make it spreadable.


Sunday, July 29, 2012

Eat what you know

Today I had the opportunity to tour the grounds of the farm that our CSA box comes from.  I know I haven't blogged much about our second year as CSA-er's and our adventures with the weekly box but I can tell you that we are enjoying it just as much as we did last year.   What's nice about no longer being amateurs in the CSA world is that in year 2 you know what to expect above all else.  You know to pace yourself especially when it comes to those lovely leafy greens and how to avoid the burn-outs that we experienced last year of what felt like endless weeks of eating the same veggies.  You become better prepared about how you plan to use your veggies as you've now had an entire year to remember recipes (and think of 18 different ways to conquer the kale) and how to look ahead with the help of the freezer in order for things to be there if you aren't quite ready to use them just yet.  


So we set out today to tour the grounds of Stone Gardens Farm in Shelton and got to hear first hand from our growers, Stacia and Fred what it's like to grow a wide range of veggies that provide for close to 1000 CSA boxes each week and has made them one of the most popular farms in Connecticut.  Shown below are a couple photos from the tour and above all else it gives you so much appreciation for what you're eating and everything that goes into it.        It allows you to never look at a veggie from the grocery store and a veggie from the farm in the same light again because there is no way they are created equally.  I found the grounds breathtaking and beautiful and maybe just maybe I finally have become one with nature as my Mother so often urged me to do when I was younger as we were on a ski lift or a beach.  It was fun to pick the brains of the farmers and I came away learning a lot of new things about growing and farming and without a doubt can see their commitment to producing great crops.  


rows upon rows of beets

come on eggplant...I'm ready for you

excited to see the different varieties of peppers that are a few weeks out

corn for as far as you can see 

squash plants in the front, tomatoes off in the distance


Wednesday, July 25, 2012

Yumaste

Maybe it's been all the yoga that has recently entered my life or no longer feeling like I'm wasting away on a hot, crowded Metro North train on a daily basis or just the Summer season in general but it feels like I'm in a "new found, semi -permanent state of calm".  (If you asked me a year ago, I would have never in a million years described myself as someone in a state of calm but I guess a 4 month sabbatical can do that to you) .  There have been the "ease into the day type of weekends", a fast growing addiction for the Sunday nightcap bev to fight off the end of the weekend depression and the habit that you can only really get away with in the Summer of the daily cocktail (or 2) enjoyed on the deck.  It's where you can sit for longer then you usually allow before running off in 17 different directions.  You find yourself putting off the projects for another day because you just want  to soak it in and breathe it out as those "over-stimulated" days are right around the corner.  


Here is the latest cocktail to make it into the rotation thanks to Mario Batali  found in last week's NY Times Sunday Magazine 


The Yumaste Rhubarb Gin and Tonic


In a small sauce pan combine 1 pound fresh rhubarb that is cut into a 1 inch size dice with a simple syrup solution  that is made  up of 1 and 1/2 cups each of water and sugar.  Let the rhubarb pieces poach in the liquid for a couple of minutes over medium heat until they become quite soft and their color and flavor mixes into the liquid.  Let the liquid become a nice syrupy consistency where it reduces a bit and then strain the rhubarb pieces out of it that can be saved for another use (crisp, ice cream topping, jam mix in, all of the above).  Here you have your rhubarb simple syrup that will store quite nicely in your fridge for whenever your beverage (alcoholic or not) needs an instant pick me up.   I also have to mention that it is this fabulous bright shocking pink color that you will immediately fall in love with.  


Now onto the drink making:
Fill a highball or tall glass with ice.  Pour in between an ounce and ounce and a  half of the rhubarb syrup depending on how sweet you like your drink into your glass (I actually went with the method of pouring my syrup in a plastic squeeze bottle so I've just been doing a generous squeeze).   Next add your gin depending where you like your like drink to be. (If we were going with an official recipe, I would say 2 ounces but  as you can see from the picture we enjoy our cocktails in this house out of glasses that have lines etched into them which I use as the pouring gauge).  Fill the remainder of the glass up with tonic water and top with a freshly cut piece of lime.  Give it a quick stir and I assure you that the calmness will set in for you too.


"Treat yourself.  Don't cheat yourself" is actually a favorite and well-used phrase of my brother that works perfectly here for this note.  When it comes to drinks like G and T's go ahead and treat yourself to really good quality ingredients because they will make something classic and simple taste so much more delicious.  We have gotten hooked on the habit of high quality tonic waters such as Q tonic that can be found at Whole Foods or Williams-Sonoma and the fact that it comes in small bottles basically eliminates the issue of breaking into flat tonic water.  Our gin of the moment is Greylock Gin from the Berkshires because why wouldn't you want to drink something made in New England?

Thursday, July 5, 2012

It could have come straight out of Maryland...

When we were in Annapolis a couple of months ago I had a major tease when it came down to the land of desserts.  The short story was that we were in a classic seafood restaurant consuming our fair share of crab (because when in Maryland what else are you going to eat?) and discovered something on the dessert menu called "Smith Island Cake" which I had never heard of before.  After a quick educational session from one of my cousins, I learned it was the official state dessert of Maryland and was a cake consisting of numerous thin layers sandwiched between frosting and crushed candy bars.  I was instantly intrigued and while too full to consume it then, the plan was hatched for later to hunt down an authentic slice of cake.  Well needless to say, the plan was foiled by a different restaurant changing their menu and we left Maryland with only the chasing thought of what the cake could be like.  


But I'm a girl who is a doer that takes matters into her own hands and figured "well if I can't have the cake somewhere, then I am just going to make it myself" and the latest baking challenge was born.  So here I was last weekend, hosting a birthday cookout/luncheon for one of my Uncle's as well as aligning perfectly with my Maryland (soon to be San Diego) cousins up visiting and I knew this was going to be the right opportunity to try my hand at the Smith Island Cake.  And maybe I was delusional from baking in the heat but when I finished baking it the night before and stood there examining my finished cake with my mental baking high, I knew that I did Maryland quite proud on this one.  This is one of those cakes that is really easy to make and actually starts with a boxed yellow cake mix.  I followed the recipe pretty closely from Saveur Magazine that I followed pretty closely but swapping out their chocolate frosting for my "tried and true, never fail" chocolate sour cream frosting that I can literally eat by itself it is so frickin good.  The cake also has an almost perfect ratio of cake and frosting and as we were devouring it on Sunday, declared it a perfect birthday cake as well.  It might just be the official state dessert of Maryland but it is now going in my own personal rotation of go to/perfectly domesticated desserts.  


this was one of those moments where half way through consumption, I had the "H.S." moment of forgetting to take photos so here it is in half devoured form.  You can see the layers at least.


Smith Island Cake 


-Preheat your oven to 350 degrees.  Spray 4 8-inch round baking pans with nonstick baking spray or grease generously with butter and a heavy sprinkle of flour.  (I only own 3 8-inch rounds so I just did 3 rounds of baking instead of 2).


-In a food processor pulse 4 frozen large Reese's peanut butter cups into a fine powder and transfer into another bowl until later (I would suggest refrigerating  so they don't melt all together).  Pulse remaining 4 large Reese's peanut butter cups into small chunks and transfer to another bowl and chill.


-In the bowl of an electric mixer, mix together the following on low speed until well combined about 10 -12 minutes:

  • 8 tablespoons or 1 stick of unsalted butter, softened
  • 1  18 1⁄4-oz. box yellow cake mix, preferably Duncan Hines
  • 1 and 1/2 cups evaporated milk
  • 1 teaspoon vanilla extract
  • 4 eggs at room temperature 
  • 1/3 cup of water 
-Pour a thin layer of batter into the prepared baking pans (it comes out to be just around 2/3 of a cup.  You want it to completely cover the entire bottom of the pan but not too high at all because remember we are going for thin layers here.)  Set remaining batter aside for next rounds.   Bake until cooked through and golden around edges, 11–14 minutes. Set aside to let cool slightly, then loosen cake layers with a knife and invert onto cooling racks and then you can layer them with parchment on a cookie sheet until you are ready to assemble. Coat the pans with whatever method you are using and repeat the process a second and third time.  (Round 3 will only be 2 pans instead of 3 to get you to 8 layers).  

-As your cake layers are cooling, make your icing from the link listed above.  Take your first cake layer and spread about a 1/3 of a cup of frosting evenly onto it.  Sprinkle about 1 tablespoon powdered peanut butter cups onto the frosting and repeat with remaining layers. Frost outside of cake with remaining icing on top and sides and sprinkle peanut butter cup chunks on top.  

Monday, June 25, 2012

Back on the bike...

You don't have to tell me it's been awhile since I've updated this lovely little food blog of mine.  Don't think I forgot about it which wasn't the case as all.  It was a combination of time management,  too many activities, wanting to squeeze even more in and not enough hours in the day (which I know I'm preaching to the choir but really how about only a couple more hours each day?).  So here I am back on the bike and committed once again to the blog because come on; it's June, it's the land of summer dining and living and year 2 of the farm share has begun again and how can you not want to write and share about all of the adventures that happen in the kitchen.  So here is a recap of some favorites that have come out of the kitchen over the last couple of weeks:


-Rhubarb Ice Cream with a Caramel Swirl 
I have mentioned it before but I have somewhat of a love affair with all things rhubarb and I know that I don't remotely consume enough of it.  It is one of those wonderful vegetables that plays well either way whether it is being prepared in a sweet or savory dish and it is kind of the forgotten spring/summer option behind all of those berries.  I once had a rhubarb gelato at Capogiro in Philadelphia which was amazing like the rest of their flavors so when I came across this recipe in the NY Times a couple of weeks ago, it wasn't even a question of whether I would make it but when.  I was able to get a bunch of skinny stalks of rhubarb at a local farmer's market  one weekend and we were on for the first batch of ice cream for the season.  I actually used my tried and true Philadelphia Ice Cream Base and then just picked up the recipe when it got to simmering the rhubarb until tender and making a silky caramel sauce.  The original recipe looks delicious but I am a fan of egg-less ice creams because they tend to air on the lighter side and require much less prep and waiting time.  As I learned the first time I ever made ice cream, as I was heating eggs over a double boil and using every bowl in my kitchen this wasn't going to work out so well for me and therefore adopted the Philadelphia method which makes it so much more pleasurable to whip up a homemade batch of ice cream pretty much any time we wanted it with hardly breaking a sweat.  The ice cream has a sweet mellowness to it from the rhubarb and a fun twist with the added caramel.  Can't wait to make it again this time with a batch of snickerdoodle cookies to sandwich the ice cream between.


-Whipped Peanut Butter Frosting
The catiecakes have made multiple appearances all over Southern Connecticut in the month of June and this Peanut Butter frosting is the newest, popular addition to the mix.  Spread it on a brownie or cupcake and top it with a mini peanut butter cup from Trader Joe's and I promise you will look like a rock star when it comes to dessert. I know peanut butter is a tough sell for some people but the frosting is so light and not overly peanuty with the cream cheese mixed in that even the non peanut lover will be won over to.


Wednesday, May 30, 2012

Oh Summer How I've Missed You So...

I know we are a few weeks off until that official day on the calender but thanks to that amazing weather all weekend, Memorial Day tends to feel like the "opening day" of Summer.  Those nice 3 day weekends do wonders for the body; you kick the intensity down a couple of notches, suck in that nice fresh summer air and mellow out because for 3 months it is all about relaxed, laid-back living.  During the rest of the year it always feels like you are up against some time crunch where you are rushing from thing to thing and never getting a chance to take a breather but then comes summer and the attitude completely changes.  Plans seems to fall into place because it's where the day takes you and you squeeze out every possible waking hour by eating later and lingering longer.  There are 3 other seasons to be all tight, perfect and in control...let your hair down and have Summer take you where it's meant to go.  Figure out what you want out of Summer this year and make the personal pledge to yourself that you are going to get everything you want out of it because it's right in front of you, full of promise for the taking.  


So in honor of the "opening day" of Summer, here are 2 amazingly easy recipes to enjoy all season long.  Let me highlight the beauty of the fast and easiness vibe to both of these dishes because as much as I love outdoor dining, grilling, and all of those wonderful Summer foods I hate having to be chained to a hot kitchen for long periods of time while I have far more enjoyable things to take part in.  First off, here is great new take on Classic Potato Salad made with eggs and pickles from my favorite blogger Dinner: A Love Story.  My calendar is marked for June 5th when their first cookbook comes out but Jenny and Andy among many others things know how to do Summer right so use their blog as a go to for meals all season.  They are the geniuses behind the Yogurt Marinated Grilled Chicken and I'm fully aware that I am mildly obsessed with them but more and more I feel like they could be my friends or neighbors with their "down to earth" take on food and entertaining.  The potato salad is a breeze to make and the combination of smashed potatoes, eggs and sweet pickles gives it a classic taste reminding you of something you've had a while back but couldn't quite replicate until now.  
Perfect summer kind of meal complete with a Narragansett 


These Brownies with Orange Cream Cheese Icing and Toasted Coconut should become your "go-to, do not pass go until you've made these" summer dessert whether it be for a picnic, get together or just a hankering for something sweet.  I actually made these brownies several years ago when the recipe was first published in Bon Appetit back in the summer of 2007 (and after a quick flip through the summer recipe binders realized that I still had the article carefully filed away) but became reacquainted with them this past Friday evening.  Like the good Connecticut residents that all of my friends and I am, we knew that we had to kick off the weekend at "The Place" which turned out to be a very fun evening filled with lots of laughs, wine and seafood.  We all brought different things and my friend Deanna volunteered to bring the dessert.  I love my friend Deanna dearly, we have literally been friends for about 90% of our lives and while she has many talents and attributes she isn't actually one to jump at the opportunity to bake so when she said she would bring dessert I was somewhat intrigued to see what was going to be the result of this move.  When the dessert was presented Friday night and I recognized what it was, I almost fell off my stump at the thought that Deanna went so far into the baking world that she had made her own homemade brownies but she actually did one better then that...she pretty much blew my mind with this trick that you all should adapt immediately.  Take your favorite store bought mix of brownies and prepare according to the package directions.  Mix into the batter a melted bar of 75% cacao chocolate until well incorporated and then continue along with the baking instructions on the back of the box.  Top with the homemade orange cream cheese icing from the link above and finish off with a healthy amount of toasted coconut.  By all means as I've said before "if you feel the need and desire to go all Martha Stewart on us please go ahead and make the homemade brownies" but can I assure you that people are not going to know the difference with this little trick.  And plus, you have far better uses of your time in these Summer months then to be slaving over brownies with 12 different ingredients in them.


Thursday, May 24, 2012

How to Succeed at Entertaining (without really trying)

I realized a couple of years ago that I'm actually quite a fan of graduation season that comes upon us every May and June and by no means do I need to be the one graduating to get into it.  I don't know if its all of those beaming graduates in shiny cap and gowns, the ceremonial pomp and circumstance of it all or just the underlying theme that a new chapter is beginning that is filled with so much promise and optimism.  Give me one of those inspiring commencement addresses or an up close and personal story about someone graduating and it's all over for me.  So as everyone is out there currently telling graduates to "carpe diem the day" and  "to go and set the world on fire" as my own Jesuit education always pushed me to do, I figured why pass up an opportunity to dispense some of my well learned and tried and true advice when it comes to entertaining.  There might not be a diploma or a fancy shamcy degree at the end of the post but I can assure you will be a better cook and hostess and that's a just as good skill to have.


1.) Keep the drinks simple 
In our house, we like to keep our alcoholic beverages of choice on the simple, straightforward side: wine, beer, gin and tonic, bourbon and water, vodka on the rocks with a twist.  I can assure you that we will never be serving up some fancy "mixologist" drink that has 12 different ingredients in it and involves bitters.  I know those drinks are all the rage, and there's a place and a time but we just aren't those kind of those people at home.  But sometimes the occasion calls for mixing it up a little bit (no pun intended) and you need a go to, jazzed up drink.  The beauty of this delight is that it can be served morning, noon or night (because in my book, it is always acceptable to indulge in a bubbly bev anytime) and involves minimal ingredients.  

Black and Bubblies
In a champagne flute or wine glass, add a tablespoon of black current, or black raspberry puree (any berry on that note will do).  Add a splash of St. Germaine elderflower liquor to each one (which if you haven't had this already, you have no idea what you are missing...it's amazing on so many levels).  Fill the remainder of the glass with prosesco or cava (the Spanish cousin in the bubbly family) and give it a quick stir to mix all together.  And there you have it, that's all there is to this fabulous 30 second cocktail.  It's also a good starting point to an event that makes it easy to jump to something else such as wine later in the night because God knows we have all been there when we mixed the bar and it is never pretty nor enjoyable the next day.


2.)Appetizers should be a nibble not a meal
I happen to love appetizers and can make an entire meal out of them but I know their place on a full dinner menu.  They are a prelude, a quick snapshot or a tone-setter of what the meal holds.  Give your guests enough snacks to nibble on to hold their attention while everyone is settling in and then call it a day.  Because as I've said before "Do you really want your guests filling up on cheese and crackers when they really should be saving their appetites for the main event".  I usually either make one or 2 simple things that can be served at a variety of temperatures depending on when your guests arrive or follow this fail proof formula for a perfect appetizer platter:
-A fruit or vegetable (red pepper slices, peaches...think color but the sky is the limit).
-A cheese (most recently I went with a triple creme gouda that caught my eye at Trader Joe's but I always try to get something a little different that you wouldn't snack on during your average weeknight)
-A meat (very few people out there do not get excited when they see a fun cured meat or pork product whether it be salami, prosciutto, or something else in the pig family.  I happen to love either the plain sliced salami or pepper edged one from TJ's but if you are lucky enough to have a local Italian market, try whatever looks good and they always love to give you a sample!).
-A cracker or bread product (These have become my latest obsession but fresh bread ripped into pieces, or any interesting cracker will do.  Anything above the triscuit or cheez-it is a safe bet and I've found that the best finds are always in the cheese sections of stores).
-A dip or spread.  Depending on the season and if you are feeling ambition, you can pretty much make some sort of bruschetta or caponata out of so many vegetables or there are good store bought ones out there as well.  I happen to like hummus as well a lot and have a go to recipe for a hot buttered Israeli version that I love.  I was on my way to making that this past Saturday until I was browsing the dips at TJ's and saw something new on the shelf which was a white bean basil spread and thought "Oh I can make this just like I usually make my hummus" and an idea was born.  Out when the chickpeas, in went the cannelloni beans and we were off.  Here is the rundown:


Warm White Bean and Basil Spread (based on the TJ's version and Zahav Hummus)  


-Preheat your oven to 400 degrees. 
-In a small frying pan, melt 1 tablespoon of butter until foamy and then toss in 1 to 2 garlic cloves depending on size.  Saute until soft but watch to make sure they do not get too brown.  Set aside to cool slightly.  
-Into a food processor or mini prep, add 1 can of cannelloni beans (drained but reserve the liquid), 2 tablespoons of butter cut into small pieces, the juice of half a lemon (2 tablespoons),  the sauteed garlic and 1 tablespoon of tomato paste.  Puree until smooth and then add 3 tablespoons of extra virgin olive oil and a tablespoon or 2 of the reserved bean liquid if you think your spread needs it.  Continue to puree.  The whole key to success with this spread is to puree far longer then you would ever believe is necessary.  Just let the food processor run continuously for a couple of minutes and you will end up with the most smooth spread.  Season with salt and pepper and throw in a handful of fresh basil leaves.  Give it one more quick whirl to combine by the basil and you are good to go.
-Transfer the spread to an oven safe baking dish.  Top with a few pine nuts (if you have them around) and sprinkle of oregano and and swirl of olive oil. (You are basically going for aesthetics here so whatever you have in your kitchen to make it pretty is going to work out well...it's the garnish). 
-Bake for 15 -20 minutes until it begins to bubble on top and is warm throughout.


3.) Don't be afraid to change up the plan
There are times when I am a meticulous planner and list maker.  I am all about the "plan of attack" and executing it perfectly and then there are times where I really have no idea what I'm going to do until I'm in the middle of a grocery store and then you just have to go with your gut and what looks good.  This happened to me this past Saturday where all along I thought I was going to make roasted zucchini as my veg but then walked into Whole Foods in Fairfield (which can I just say blows the Milford one out of the water and is pretty much only 10 minutes further from my house) and got swept up by some beautiful skinny asparagus grown in New Jersey.   After taking a quick peak at the zucchini to see what my options were and discovered that it was grown in Mexico for only a dollar cheaper per pound  it became a no brainer what I was going to get.  Don't be afraid to not have a plan or abandon the  current one if it isn't working because we all know that the best thing in life are surprises and the unexpected always wins out.


4.) Remember you are a guest at your dinner too 
So many times, people think they need to be short order cook when having guests over for dinner where they end up chained inside the kitchen while everyone else is having a good time and relaxing.  Above all else having a dinner party is mainly about your guests and the food secondary.  If you're with the right group of people, it really doesn't matter what you eat and almost anything will taste good when you are laughing so hard it feels like you're cleansed by the end of the night.  But because this is a food blog, I just can't leave you to your own devices so here is what will be my dinner party dish of the summer of 2012...the Candied Pork from one of my favorite blogs.  I made mine with skinny pork tenderloins that went on the grill instead of the oven and the only enhancement that I added was brining the pork overnight.  What can be better then a recipe that you brine overnight, make a simple marinade in the morning and then all that is left to do is grill up 30 minutes before you are ready to serve it?  The spinach salad that accompanies the pork recipe is also amazing and with a few candied pecans thrown in it's the perfect dinner party salad.  


Wednesday, April 25, 2012

Dependables

There are certain things in life that you should always be able to depend on to be there for you.  To be able to pull out in a moment's notice, to never fail, and to make you look like pretty much a rock star upon completion every time.  They are those things that once you find them, you can stop looking for anything else similar because your dependable is basically untouchable.  It's like when you find them you almost want to exhale that huge sigh of relief because it's just going to be another thing that is going to make your life so much better.  I love to gain dependables in my life and when one comes along it is the most amazing feeling.  I have "back pocket dependable" recipes for banana bread, chocolate chip cookies, basic tomato sauce and probably 20 other different things but a few weeks ago I added a very big one to the pile:  the most perfect roast chicken.  There is something about cooking roasted chicken that feels extremely homey and domesticated from the savory smells that whiff through the house, to the long-ish, drawn out cooking time, to the classic feel of the meal as you are eating it.  Come on, can I paint an even more "pro roast chicken" picture then I'm doing right now?  


I came across this recipe for Honey-and-Lemon-Glazed Roast Chicken from an old Food and Wine Magazine a couple of weeks ago when I was in the mood for chicken one night and have already made it twice.  The sweet-salty-acidic combination in the glaze of lemons, honey and soy sauce is amazing and I loved the idea of the high to low cook temperature technique in the recipe.  I promise you, this is one roast chicken recipe that you will always be able to depend on. 


Note:  The recipe calls for small 3 pound chickens.  I like to use larger chickens (5-7 pounds each) that tend to have more meat on them.  I just extended my cooking time longer at both temps and checks the bird's internal temperature to make sure they were done.  I also like to roast my chickens onto of a bed of veggies that are not so much to eat but because they add tremendous flavoring to the stock that I've made after with the carcasses and such.  Oh and one more thing - if the bird that you're roasting has one of those plastic pop up timers, please pull it out beforehand or ignore the purpose of it.  I know more disasters that have come out of it because call me silly but there is no way that little thing can predict proper temperatures and such.    

Wednesday, April 18, 2012

Just the best frickin dessert out there

For as long as I can remember my mother has had a recipe box in the kitchen containing her arsenal of go to dishes and growing up I would always get pretty excited when one of those small, hand written cards would come out because it usually meant that we would be making something special or with some sort of significance to it.  When I look through the cards now you can identify themes in cooking through the years of what was widely popular and you tend to get nostalgic over different dishes that you used to have a lot as a kid growing up such as "open sesame chicken", "do ahead mashed potatoes" and "cranberry raspberry mousse".  And then you realize that there was a very big thing having to do with all things jello considering it takes up a large chunk of the desserts section.  You start to think a little harder and remember that there was always some sort of jello dessert at the buffet of party, and my Mother and Aunt had these matching Tupperware jello molds where you changed the top symbol based on the specific time of the year (which I still think is in our basement because God knows I'm going to need it for some sort of project one day).  By no means were these your run of the mill basic jello recipes.  They involved layers of fruit, cream, or crust mixed in and usually spearheading the efforts was my Mother's good friend Barbara who I would even go so far as to deem in the land of jello, she would be the queen because she probably has a whole recipe box devoted to these recipes.  I know that jello gets a bad rap a lot of the time because there are some dousies out there involving multiple canned goods or weird texture issues that have mentally scarred you.  You think it's dated and old-fashioned and I even used to think "oh I'm way too gourmet for jello".


But then 2 summers ago, down at Barbara's cottage in Milford one of those jello desserts made an appearance from the archives and after one bite I forgot how much I loved it and those apprehensive, too good for jello thoughts quickly fell by the wayside as I went in for my second helping of the pistachio dessert and I was back on board of the jello train.  The pistachio dessert has now made appearances at multiple parties and one of my friends even deemed it "the best frickin dessert ever" because it's refreshing after a big meal and sometimes you just aren't in the mood for a slice of cake or another baked good.  I know I don't have to give any more reasons for you to make it yourself after you've seen the picture or ever experienced a bite of it but let me just push you further over the line so I can almost guarantee that you'll be running out to grab the ingredients.  It's super easy to make, travels well, and can be made the day before.  Do I have to be any more convincing?  I promise once you have your first helping, you'll be back on the jello train too and if you're still wavering then we'll just have to bring in Barbara's strawberry pretzel jello to win you over once and for all. 


good shot of all the layers


Pistachio Dessert Squares


Preheat your oven to 350 degrees.  With a pastry blender or two forks, mix together until crumbly:
-1 stick of unsalted butter
-1 and 1/4 cup of flour
Then add in:
-1 cup of ground nuts (walnuts work best) 


Spread into a 9 x 13 greased baking dish and bake for 20 minutes.  Set aside and let cool.


In a mixer, combine 
-8oz of cream cheese, softened
-1 cup of confectioner's sugar 
-Half of a container (the 8oz size) of cool whip.


In another small bowl, whip together until firm:
-2 packages of instant pistachio pudding 
-3 cups of milk 


First spread cream mixture evenly onto the cooled crust and then top with the pistachio pudding.  Add the remaining half container of the cool whip as your top layer and chill.  


Thursday, April 12, 2012

The Brunch Series: Recipe Link Round-up

To round out the series on brunch, here are the links to some of my favorite recipes that you can now make at home:


-Carrot Souffle I came across this recipe in a home magazine a couple of years ago and instantly fell in love with a new creative take on how to serve carrots.  Do not be fooled or frightened by the word souffle in the recipe.  It is a foolproof recipe that is made very easy by the use of a food processor.  I almost always make it ahead of time and then just bake it right before it's going to be served.  


-Baked Glazed Ham Ham is one of those party foods that everyone always gets really excited about.  The host loves it because they are relatively simple to make and feed a large crowd with ease and guests are into it because it's one of those things you don't make at home on a regular basis and who doesn't love those mini ham sandwiches.  A lot of times, a ham will come with a ready made glaze but sometimes it's fun to jazz it up a bit with your own homemade touch.  In years past I've made a pineapple mustard glaze by Martha Stewart that is quite delicious but I was going for ease this year and you can beat the Barefoot Contessa's glaze recipe.  Another thing that can easily be made ahead of time and I swapped out apricot preserves for the mango chutney and it was just as good.  


-Roasted Salmon with Mustard Tarragon Sauce One of my favorite ways to cook salmon and by baking it at a high temperature, it almost seems at first bite like you might have poached it but since not many home cooks actually own a fish poacher this is a simple way to get that kind of flavor.  Also a great weeknight dinner and can be served at room temperature over a salad as well for a fancy lunch.  


Monday, April 9, 2012

The Brunch Series: Spring Pea and Artichoke Salad

This is one of my favorite salads to include in a brunch buffet because it gives a great pop of color to the menu, is super easy to make and people literally go crazy for it once they've tried it for the first time.  I know so many people out there have aversions to peas probably because they remember eating canned or over-cooked peas in that horrible puke green color as kids but  when cooked properly, bags of frozen peas are great staples to have on hand in the kitchen and I've always been a big fan of them.  Whether they are tossed into a salad or mixed into a pasta dish there are so many great things you can do with them and here's just one of them.   This salad isn't limited to just brunch menus. It is a perfect accompaniment to luncheons and dinners with fish especially with the subtle dill dressing that it is dressed with.


Spring Pea and Artichoke Salad 


Sour Cream Dressing:
In a small bowl mix together the following:
-1/4 cup each sour cream and mayonnaise
-1/4 cup fresh dill, finely chopped 
-1 tablespoon cider vinegar 
-1 teaspoon salt
-1/2 teaspoon each minced garlic and pepper 


In a large bowl, add the following:
-3 cups frozen petite peas thawed 
-1/2 English cucumber, quartered and sliced thin 
-1 cup thinly sliced radishes
-1/2 cup chopped red onion
-1 (14oz) can of water packed artichoke hearts, quartered


Pour dressing over the salad and stir gently to combine.  Adjust for seasonings and serve.  


Note:  The dressing and salad can both be made ahead of time but do best when the 2 elements are kept separate until just before you are going to serve them.   

Thursday, April 5, 2012

The Brunch Series - Baked French Toast Casserole

I've come to realize that once you do something enough of times, it will eventually get over the big metaphorical hump where at once seems like this massive, chaotic, stress inducing event to where it will become second nature and dare I say, almost easy.  Well after 4 Palm Sunday brunches, we have finally hit that point where I know what we're doing, what works and what doesn't, what you need to let go of when you are entertaining for the masses (because God knows I wouldn't have it any other way then to basically stuff my home with an over capacity crowd of wall to wall people) and what each of our roles is in the whole party scheme of things.  I am a self-admitted control freak and I will mentally kill myself for things to be that "oh so perfect" vision that I imagine things to be because that's how I am but I knew after last year something had to change because admittedly so I didn't have a good time at my own party.  I was a stressed out mess, wanted to be everything to everyone and literally wanted to pass out in exhaustion by the time the desserts hit the table.  So I gave myself my own personal pep talk and said "change your game plan.  What is important to you and what can you let go?  Remember this is supposed to be fun- you are not running a restaurant here and when it comes down to it, people come for the food and they love everything but they really come to be around each other and you can't lose sight of that".  I delegated my heart out and even farmed out the cooking to my trusted friends who I knew would do a great job.  I kept calm and carried on and had so much time freed up that I didn't have to get up super early and even had time to shower and get ready like a sane adult instead of the basket case I usually am.  By the time all the food went out I was able to kick back, have some brunch bevs and enjoy myself as people went to town on everything.  I got to pick on a few things and then enjoyed my own plate once everything was done and cleaned later in the day.  I made updates to my notes for next year and if my mother wants to invite 30 more people, Maryanne go to town because I have a fail proof system in place and can handle it (even though people might soon be spilling into the streets but isn't that what it's all about?).

The first year we did the brunch, our guests really wanted the different recipes that were made so an index card circulated throughout the house as a sign up sheet for what people wanted to learn how to make.  4 years later and this lovely blog exists so I thought this would be the perfect opportunity for a little brunch series of posts so you can all replicate at home. Over the next couple of days I will share a number of recipes so keep checking back and before you know it you will have your own fool proof, back pocket brunch menu. 

Baked French Toast Casserole

In a small saucepan on low heat, blend:
-5 tablespoons unsalted butter
-1 cup light brown sugar
-2 tablespoons light corn syrup

Spread the mixture in the bottom of a 9 x 12 greased baking dish.  Cut 1 and 1/2 inch thick slices of challah bread and then cut them into smaller pieces (3 or 4 per slice depending on size) and fit them snuggly into the baking dish.  I find that its easier to have smaller pieces so when you go to serve the french toast, it is more manageable to get out.  As a guide, I usually use 2/3 of a loaf of challah per each casserole.

Beat together in a small bowl and then pour over bread:
-6 eggs
-1 and 1/2 cups milk
-1 teaspoon vanilla

Top with the zest of a grated orange and refrigerate overnight in order for the bread to really soak up the egg/milk mixture. 

Bake at 350 degrees for 45 minutes uncovered until the top develops a nice crust on top.  Finish the casserole off with a good drizzle of maple syrup and a powdering of confectioners sugar. 

PS:  In the height of getting all the food out I forgot to break out a camera to start taking pictures of everything so there will be no food photos to go along with the recipes.  Next year there can be a designated camera person!

Tuesday, April 3, 2012

Cupcakes in Bloom


I never thought of myself as this "crafty" or overly creative person until recently but thanks to my dear friend Martha Stewart, Ive begun to move over to the "D.I.Y. dark side".  Love her or hate her, the woman knows what she's doing when it comes to anything creative and she can make a masterpiece with shreds of paper, ribbon and a hot glue gun.  You read her magazines, watch the show and look at all the blogs and are bowled over but how fantastic something looks and before you know it you are sucked in, telling yourself oh so reassuringly like she makes it seem that you at home can do this as well.    You will be in the middle of a store looking at some sort of decoration and want to fall over at the price tag until you think to yourself "Oh I can totally make this at home.  Martha will have a template online or a YouTube video to just walk me through the process and then here you are knee deep in some crazy project that never in a million years did you think you would be concocting at home". 

Well this past weekend I got myself into quite the epic baking project.  There was a baby shower for our friend Julia and because Julia is a lover of all things cupcakes we came up with the perfect centerpiece/dessert: the cupcake bouquet.  Right from the beginning, there wasn't an ounce of hesitation that I wouldn't be able to pull this off and read endless blogs and watched a slew of YouTube videos to better familiarize myself with all of the "how-to" mechanics.  I read the trouble shooting tips to avoid any sort of mishap and even did a test run assembly with store bought cupcakes so I wouldn't be trying this for the first time at 10pm on the night before the shower.  I rounded up a strong baking crew to assist in the baking and decorating since we were making over 200 cupcakes and putting together 8 arrangements and even made countless "to-do" lists and schedules so it would be perfectly planned out.  Baking the cupcakes was a quick sprint in the park.  I picked 4 classic flavors that I make all the time so it would be a straight forward process and discovered the "life-changing" joys of what a 24 well muffin pan could do to your baking. (I always knew that massive muffin pan from WS would come in handy one day).  Assembly of the cupcakes onto the Styrofoam balls went better then expected once we got into a groove and then we hit the frosting stage and here's where things started going downhill fast.  For a majority of my cupcakes I use a cream cheese based frosting that's delicious and super easy to make and I never thought for a second that it wouldn't work well on the bouquets.  Well let's just say cream cheese frosting isn't meant to be piped on a different angles, gravity is not it's friend and we discovered pretty quickly that we were having temperature control issues as well with the frosting.  I couldn't pipe a cupcake for a life of me without it looking like a 6 year old did it and needless to say I was frustrated and ready to throw that piping bag against the wall and after everything going so smoothly all day, the project was at a standstill and we had 200 naked cupcakes that needed frosting. 

This is why you should always have close friends around you for projects like that aren't afraid to go tell you to take a breath, step away from the ledge and take control of the sinking ship and that's what Carmina did (and I know one day is she going to have quite the project that I will be assisting with to make this a fair trade off).  She convinced me that we needed a much thicker frosting that would hold up so after much debate we switched to a Swiss meringue butter cream that as soon as she started piping we knew would be successful.  There were points where we were covered in blue frosting, and I was even attacked by frosting coming out of the mixer that gave us all a good, much needed laugh. I never thought the process would end and in what had by then turned into the wee morning hours the last cupcake was piped and the kitchen was cleaned.  I can tell you I was humbled in a big way that very few things have the ability to do to you and I would have never made it without Carmina and Lisa who became our chief sprinkler and cupcake filler.  We learned a lot about the art of the cupcake bouquet and I know for a fact that this isn't the last of the cupcake bouquets in my life.  It's only a matter of time before the next big baking adventure that we get ourselves into comes along and we'll be ready to go for whatever the baking gods throw at us.  

The cupcakes made it to the shower in one piece and they looked great on the tables and everyone flipped out over how fabulous the idea was.  When you hear all of that, all the butter, eggs and time becomes worth it and you forget about the process of getting there and just that one moment in front of you where it couldn't be more perfect and everything else goes away.  


Thursday, March 22, 2012

How can you not love this?

As I was reading the Dining Section in the NY Times yesterday I can across this article that I just had to share:

My Big Italian Dream Party

a) How amazing does Umbria sound?  Who wouldn't want to stay in some big, beautiful farmhouse with your nearest and dearest group of people and I almost fell over when I saw the price for a week - it's actually pretty affordable when you break it down per person.  This is so going on the bucket list.

b)  As you probably already know, I'm somewhat obsessed with all things entertaining and especially theme parties.  I loved everything about this woman's party: the menu and how they divided cooking duties up among everyone, the long table for 30 outside (I have a very big thing for long farm tables), and even the little American twists thrown in.  I'm not really a believer of signs but I as I was reading the article I kept thinking to myself "hello, this is your Italian tapas party in front of you".  So I might not be jumping on a plane to Umbria anytime soon but wherever you are, as long as you are surrounded by great food, fun people and 2 cases of wine is definitely going to work in your favor, you are bound to have a fabulous time.

Tuesday, March 13, 2012

Italian Tapas

By reading this blog, you will know that I've had Italian tapas on the brain for the past few weeks ever since my fabulous dining experience at Melograno in Philadelphia.  I've been meaning to start trying out different recipes and even threw it out there for the all of the general public to read that I was going to have this theme party based on the above mentioned theme.  It's been somewhat hectic lately and I have my 4th annual Palm Sunday brunch to plan first but in the near future once full blown Spring hits there is going to be a Friday night or another perfect day that's going to scream outdoor entertaining and Italian tapas and there will be no where else I would rather be then on my deck with a glass of wine, a fun array of apps and an entourage of friends.  It's also one of these things that if I keep talking about it, I stay committed to the cause and there's no way that I'm letting this one slip away to the business of schedules and life.  This past Saturday night, I has the opportunity to start practicing with a small dinner party that I was having which included a one dish main course, therefore leading way to a little bit more substantial first course. 

We started off with cheese and prosciutto stuffed peppers.  You know those little colorful peppers you always see in the produce section that look super fun but you aren't always sure what to do with them?  Well my friend Deanna had the answer and passed along this great recipe to me that I knew I just had to make and is a keeper for the recipe box.  One of my stand by rules when entertaining is that I like to have a majority of the cooking done by the time my guests arrive because I don't want to be chained to the stove while everyone else is off in the living room having a good time and this recipe allows you to look like you have it all together.  These little peppers can easily be made ahead of time and popped into the oven shortly before the door bell rings as well as can be adapted if you are missing an ingredient or two. (For example: I left out the mozzarella in mine knowing that I had another appetizer that include it as a main ingredient). 


Cheese and Prosciutto Stuffed Sweet Peppers
Prep - Preheat oven to 350 degrees; Grease a square glass baking dish with olive oil
Ingredients:
-Multi-colored sweet peppers, ¼ side removed to form a bowl or “boat;” seeds and membrane removed.
-1 small container or 1 cup of ricotta cheese (part skim)
6 small fresh mozzarella balls – drained on paper-towels and roughly chopped
1/4 cup (small handful) grated Parmesan cheese
4 leaves fresh basil – Julienned
1/4 pound of thin sliced Parma prosciutto – Roughly chopped into 1 inch pieces
1 tsp Garlic Powder
1/3 cup Italian breadcrumbs (eye ball this because you are just sprinkle some over the top of the peppers)
Olive Oil
Salt and Pepper to taste
Instructions:
Position the peppers in the glass baking dish, cut side up. Cover with tin foil and bake for 10 minutes. Remove from oven and set aside. Increase oven temp to 425 degrees.
In a small bowl, stir to combine ricotta cheese, chopped mozzarella balls, Parmesan cheese, basil, prosciutto and garlic powder. Season with salt and pepper.
Generously stuff each pepper with the cheese mixture. Sprinkle the breadcrumb over the cheese of each pepper and drizzle with a little olive oil.
Bake in a 425 degree oven, uncovered, for 15-25 minutes, or until the breadcrumb starts to brown and the cheese is bubbly. The peppers will begin to char around the edges.
Remove from oven and let sit for 5-10 minutes so the peppers can cool and the cheese can firm.
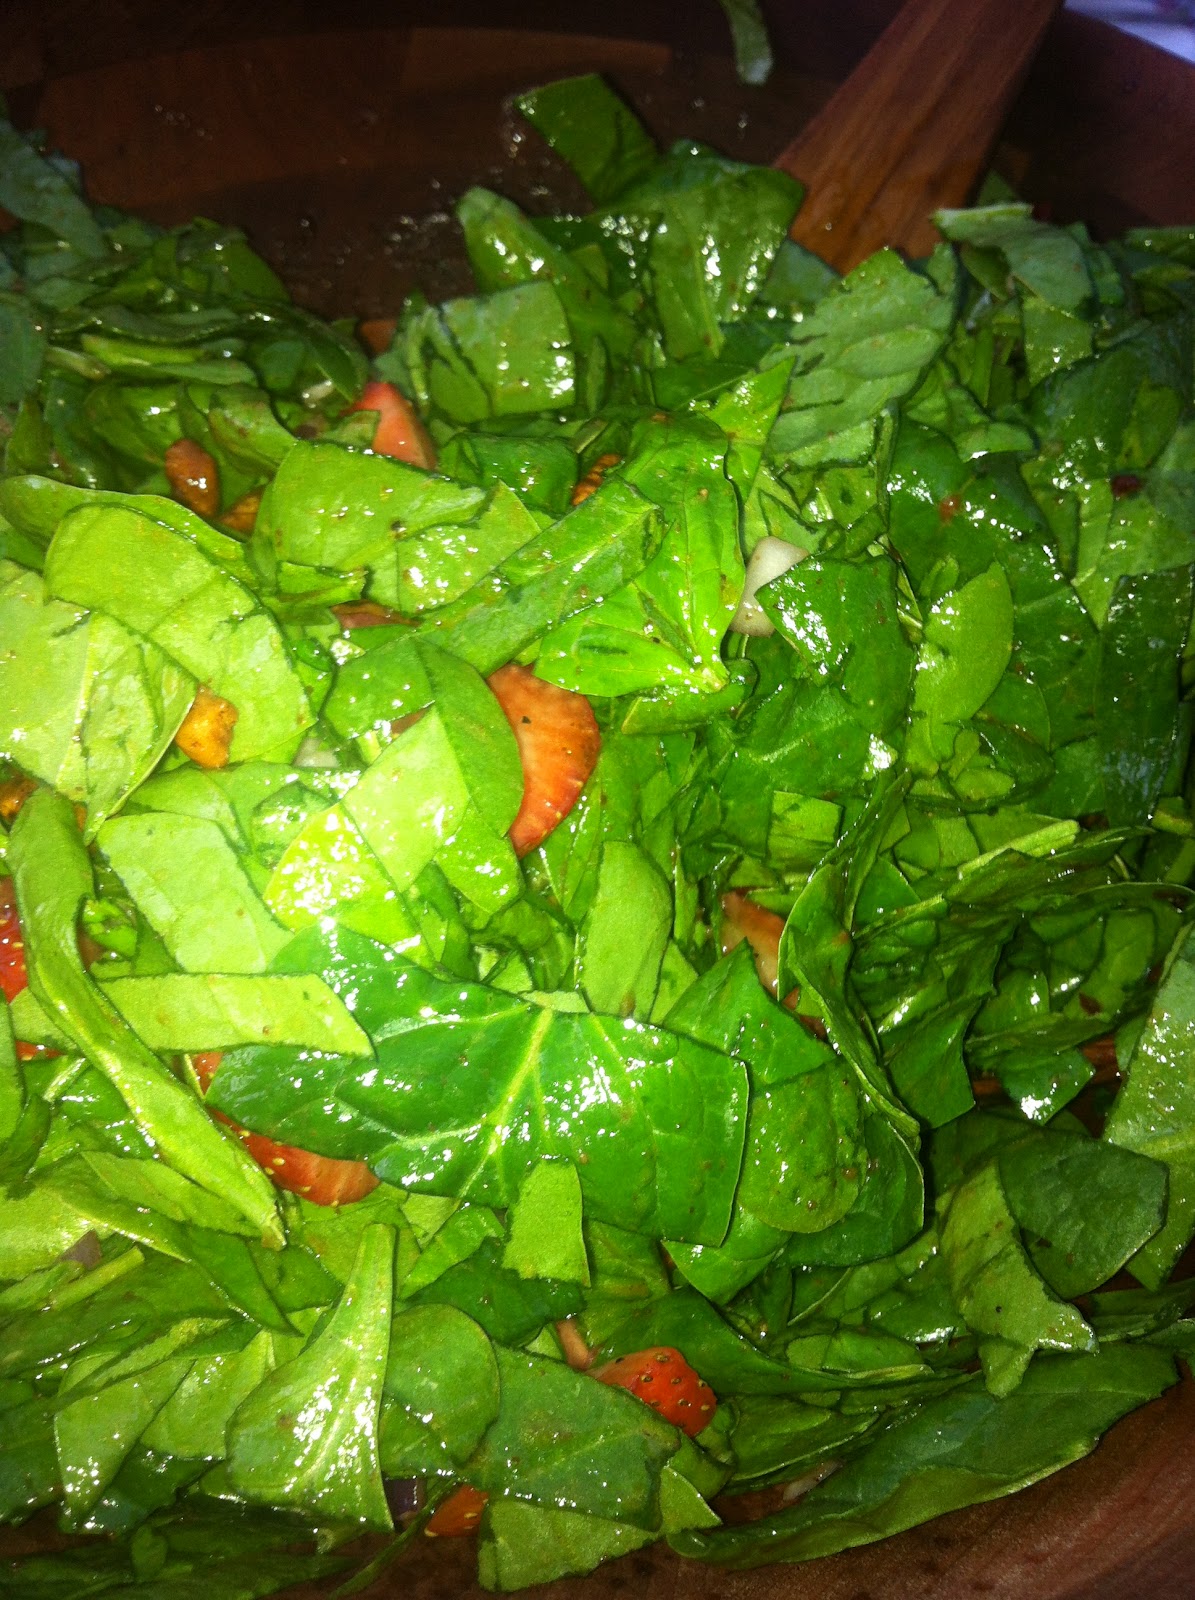
The second appetizer I made was mozzarella in carrozza based on Lidia Bastianich's recipe linked here.  I'm never one to turn down a piece of fried cheese and liked how at Melograno it was made between two slices of bread and was excited to try it out at home.  Another recipe that can easily be made ahead and then kept warm in the oven because I don't know about you but hot oil and a dredging station in the kitchen isn't exactly something I dream about when thinking of ways to entertain guests.  Melograno's version was served with an artichoke mostarda that I actually decided to serve in my salad instead so I took inspiration from Pasta Cosi in Branford and made my own lemon caper radicchio sauce to serve on top of it and it was the right amount of sauce and flavor that didn't make the mozzarella heavy likes red sauce tends to do with the dish.  The lemon sauce is very similar to a sauce I serve with chicken but would also work well with shrimp or pasta as well. 

Lemon Caper Radicchio Sauce
Ingredients:
-4 tablespoons of unsalted butter, divided
-1 tablespoon or 3 cloves of garlic minced
-generous pinch of red pepper flakes
-1/2 cup of limoncello*
-1/2 cup of radicchio, finely chopped
-2-3 tablespoons of capers
-2 tablespoons of freshly chopped parsley
-salt and pepper to taste
Directions:
In a small frying pan, heat 2 tablespoons of butter until melted.  Add garlic and red pepper flakes and cook until soft 2-3 minutes.  Add radicchio to pan and cook for another few minutes until wilted.  Deglaze pan with limoncello and cook until alcohol cooks off and sauce reduced a little bit, 5-6 minutes.  Add capers and let simmer until sauce has a nice thick consistency.  Finish the sauce off with remaining 2 tablespoons of butter and season with salt and pepper.  Once sauce is off the heat, add parsley right before serving. 
*Note:  I discovered I loved cooking with limoncello kind of by accident.  One day I didn't feel like opening a bottle of wine for probably a recipe that called for all of a quarter of a cup but knew that I had a bottle of limoncello in the freezer so I figured "why not, lets try it" and it gave the dish this really nice subtle sweetness and it killed two birds with one stone with not having to add lemon juice separately.  If you don't have what seems like an endless supply of limoncello in your house like we do, you can easily substitute 1/4 cup fresh squeezed lemon juice and 1/4 cup white wine in place. 

Thursday, March 1, 2012

Changing up the rotation...

The weeknight meal rotation is a battle that every cook goes through on a pretty regular basis.  It's always "how do I keep weeknight meals interesting and exciting without falling into the rut of eating the same thing all the time?"  We've all been there; you work a full day, run errands, squeeze in a workout and by the time you finally get home there is barely enough energy left to sit and eat a meal let alone stand in front of the stove before you collapse into bed for the night.  This isn't some closeted issue that only some of us go through, everyone at some point is going to suffer symptoms of the weeknight dinner burnout.  Rachael Ray became a millionaire because she came up with the "30 minute meal" concept.  Real Simple magazine would go out of print if they didn't get to dedicate so many articles about saving the sanity of the weeknight dinner cook.  This is why there are so many crappy prepared foods in the supermarket that have a boatload of issues attached to them but people crack under the pressure and get sucked in.  It's hard for everyone whether you are a gourmet cook or someone who doesn't know the difference between a knife and spoon.  So what do you do so that Tuesday's dinner doesn't send you completely over the edge where you want to take a hiatus from the kitchen? (Because don't forget, after that you still have 2-3 more meals to come up with in a given week).  Well you get help and guidance from anything that will make it easier and grab tips from anywhere you can.  I have the "revelation moments" all the time where after I read something or did something for the first time and thought "why didn't I ever think of this before?".  I remember the first time I ever marinated meat in a large plastic ziploc bag and thought "this is mind blowing how easy the prep and clean up is and it feels like you are gaining back minutes of your life".  The great thing about tips like those is that they continue to be there and something is always going to come along and improve your cooking abilities, it's a pay it forward cycle. 

This week I added some new recipes to my weeknight meal rotation and they were really good that I just had to pass them along.  So good that I'm borderline disappointed that I just had them for the first time now but they are here to stay.  Tuesday night I was in the mood for Mexican but wasn't feeling the usual route of tacos or quesadillas that we normally have in our house.  I came across a recipe for Black Beans and Rice with Chicken and Apple Salsa and just subbed out the chicken for shrimp knowing that I wanted to have chicken another way the next day.  It was an easy meal to prepare, involved having to buy limited things at the grocery store and just felt fun to eat once it was presented in the bowl (almost like a fun burrito bowl at a restaurant).  You can either make the meal with a rotisserie chicken like the recipes calls for which if you haven't done it before stop wasting time and go out and buy one today.  It's like the fabulous girl's version of fast food and for $6 it will be worth every minute you save in not having to roast your own chicken.  With the shrimp, I made a simple marinate of olive oil, garlic, lime juice and zest and some chili powder that I mixed all together before brushing it on the shrimp as it was in the grill pan cooking for all of 5 minutes (another huge asset to a successful weeknight meal and grill pans are pretty inexpensive to buy).  I'm not a huge fan of plain rice so I added a little bit of cilantro, lime juice and zest as I finished it off to give it a little excitement.  If we ate a lot of rice in our house, I would totally subscribe to the time saving tip of making a big batch of it at the beginning of the week and just using it as a foundation for other recipes so I wasn't waiting to boil rice every night when I could be doing other things. 


Last night I tried another new recipe this one being buttermilk roast chicken from Smitten Kitchen food blog.   If you are not familiar with Smitten Kitchen, it is a very popular food blog based out of a tiny kitchen in New York City where the blogger does a lot of new takes for comfort food.  This was actually the first recipe I ever made from the blog but her latest post of the fried egg and friscee sandwiches with bacon isn't going to be far behind.  I always use a lot of buttermilk to bake with but the recipes usually only call for a cup or 2 therefore leaving the rest of the carton to go bad in the fridge before it gets pitched a week later.  Well not anymore!  What an amazing way to dress up a run-of-the mill chicken dish.  The chicken came out so tender with great flavors and was a cinch to put together.  The key to success is letting the chicken marinate as long as possible and making the marinade took all of 10 minutes to put together before everything got tossed into a ziploc (remember my favorite tip I mentioned above) and I was on my way out the door.  Chicken only takes 30-40 minutes to bake in the oven which is totally doable for any weeknight and do not skip the step about lining the dish with foil because why wouldn't you want to make clean up easier?  I think this would be a great dish to experiment with different spices depending what you were in the mood for and I served it up along side some simple roasted butternut squash and parchment baked asparagus.  I'm telling you and maybe I'm being a smidge dramatic but one bite and it's life altering.  I honestly can't wait to make it again.

just mix your marinade right in the bag and eliminate another bowl to wash

About to hit the oven.  Don't forget to line your baking dish.


Obviously it's been an exciting food week in my kitchen but here's one more to leave you with.  I stole this off of one of my friend's pinterest boards (the highly addicting online pin boards) but these dried strawberries that I made today were AMAZING!  They are like the adult version of fruit snacks and are super guilt free except that you can eat entire batch pretty quickly.