Sunday, July 29, 2012

Eat what you know

Today I had the opportunity to tour the grounds of the farm that our CSA box comes from.  I know I haven't blogged much about our second year as CSA-er's and our adventures with the weekly box but I can tell you that we are enjoying it just as much as we did last year.   What's nice about no longer being amateurs in the CSA world is that in year 2 you know what to expect above all else.  You know to pace yourself especially when it comes to those lovely leafy greens and how to avoid the burn-outs that we experienced last year of what felt like endless weeks of eating the same veggies.  You become better prepared about how you plan to use your veggies as you've now had an entire year to remember recipes (and think of 18 different ways to conquer the kale) and how to look ahead with the help of the freezer in order for things to be there if you aren't quite ready to use them just yet.  


So we set out today to tour the grounds of Stone Gardens Farm in Shelton and got to hear first hand from our growers, Stacia and Fred what it's like to grow a wide range of veggies that provide for close to 1000 CSA boxes each week and has made them one of the most popular farms in Connecticut.  Shown below are a couple photos from the tour and above all else it gives you so much appreciation for what you're eating and everything that goes into it.        It allows you to never look at a veggie from the grocery store and a veggie from the farm in the same light again because there is no way they are created equally.  I found the grounds breathtaking and beautiful and maybe just maybe I finally have become one with nature as my Mother so often urged me to do when I was younger as we were on a ski lift or a beach.  It was fun to pick the brains of the farmers and I came away learning a lot of new things about growing and farming and without a doubt can see their commitment to producing great crops.  


rows upon rows of beets

come on eggplant...I'm ready for you

excited to see the different varieties of peppers that are a few weeks out

corn for as far as you can see 

squash plants in the front, tomatoes off in the distance


Wednesday, July 25, 2012

Yumaste

Maybe it's been all the yoga that has recently entered my life or no longer feeling like I'm wasting away on a hot, crowded Metro North train on a daily basis or just the Summer season in general but it feels like I'm in a "new found, semi -permanent state of calm".  (If you asked me a year ago, I would have never in a million years described myself as someone in a state of calm but I guess a 4 month sabbatical can do that to you) .  There have been the "ease into the day type of weekends", a fast growing addiction for the Sunday nightcap bev to fight off the end of the weekend depression and the habit that you can only really get away with in the Summer of the daily cocktail (or 2) enjoyed on the deck.  It's where you can sit for longer then you usually allow before running off in 17 different directions.  You find yourself putting off the projects for another day because you just want  to soak it in and breathe it out as those "over-stimulated" days are right around the corner.  


Here is the latest cocktail to make it into the rotation thanks to Mario Batali  found in last week's NY Times Sunday Magazine 


The Yumaste Rhubarb Gin and Tonic


In a small sauce pan combine 1 pound fresh rhubarb that is cut into a 1 inch size dice with a simple syrup solution  that is made  up of 1 and 1/2 cups each of water and sugar.  Let the rhubarb pieces poach in the liquid for a couple of minutes over medium heat until they become quite soft and their color and flavor mixes into the liquid.  Let the liquid become a nice syrupy consistency where it reduces a bit and then strain the rhubarb pieces out of it that can be saved for another use (crisp, ice cream topping, jam mix in, all of the above).  Here you have your rhubarb simple syrup that will store quite nicely in your fridge for whenever your beverage (alcoholic or not) needs an instant pick me up.   I also have to mention that it is this fabulous bright shocking pink color that you will immediately fall in love with.  


Now onto the drink making:
Fill a highball or tall glass with ice.  Pour in between an ounce and ounce and a  half of the rhubarb syrup depending on how sweet you like your drink into your glass (I actually went with the method of pouring my syrup in a plastic squeeze bottle so I've just been doing a generous squeeze).   Next add your gin depending where you like your like drink to be. (If we were going with an official recipe, I would say 2 ounces but  as you can see from the picture we enjoy our cocktails in this house out of glasses that have lines etched into them which I use as the pouring gauge).  Fill the remainder of the glass up with tonic water and top with a freshly cut piece of lime.  Give it a quick stir and I assure you that the calmness will set in for you too.


"Treat yourself.  Don't cheat yourself" is actually a favorite and well-used phrase of my brother that works perfectly here for this note.  When it comes to drinks like G and T's go ahead and treat yourself to really good quality ingredients because they will make something classic and simple taste so much more delicious.  We have gotten hooked on the habit of high quality tonic waters such as Q tonic that can be found at Whole Foods or Williams-Sonoma and the fact that it comes in small bottles basically eliminates the issue of breaking into flat tonic water.  Our gin of the moment is Greylock Gin from the Berkshires because why wouldn't you want to drink something made in New England?

Thursday, July 5, 2012

It could have come straight out of Maryland...

When we were in Annapolis a couple of months ago I had a major tease when it came down to the land of desserts.  The short story was that we were in a classic seafood restaurant consuming our fair share of crab (because when in Maryland what else are you going to eat?) and discovered something on the dessert menu called "Smith Island Cake" which I had never heard of before.  After a quick educational session from one of my cousins, I learned it was the official state dessert of Maryland and was a cake consisting of numerous thin layers sandwiched between frosting and crushed candy bars.  I was instantly intrigued and while too full to consume it then, the plan was hatched for later to hunt down an authentic slice of cake.  Well needless to say, the plan was foiled by a different restaurant changing their menu and we left Maryland with only the chasing thought of what the cake could be like.  


But I'm a girl who is a doer that takes matters into her own hands and figured "well if I can't have the cake somewhere, then I am just going to make it myself" and the latest baking challenge was born.  So here I was last weekend, hosting a birthday cookout/luncheon for one of my Uncle's as well as aligning perfectly with my Maryland (soon to be San Diego) cousins up visiting and I knew this was going to be the right opportunity to try my hand at the Smith Island Cake.  And maybe I was delusional from baking in the heat but when I finished baking it the night before and stood there examining my finished cake with my mental baking high, I knew that I did Maryland quite proud on this one.  This is one of those cakes that is really easy to make and actually starts with a boxed yellow cake mix.  I followed the recipe pretty closely from Saveur Magazine that I followed pretty closely but swapping out their chocolate frosting for my "tried and true, never fail" chocolate sour cream frosting that I can literally eat by itself it is so frickin good.  The cake also has an almost perfect ratio of cake and frosting and as we were devouring it on Sunday, declared it a perfect birthday cake as well.  It might just be the official state dessert of Maryland but it is now going in my own personal rotation of go to/perfectly domesticated desserts.  


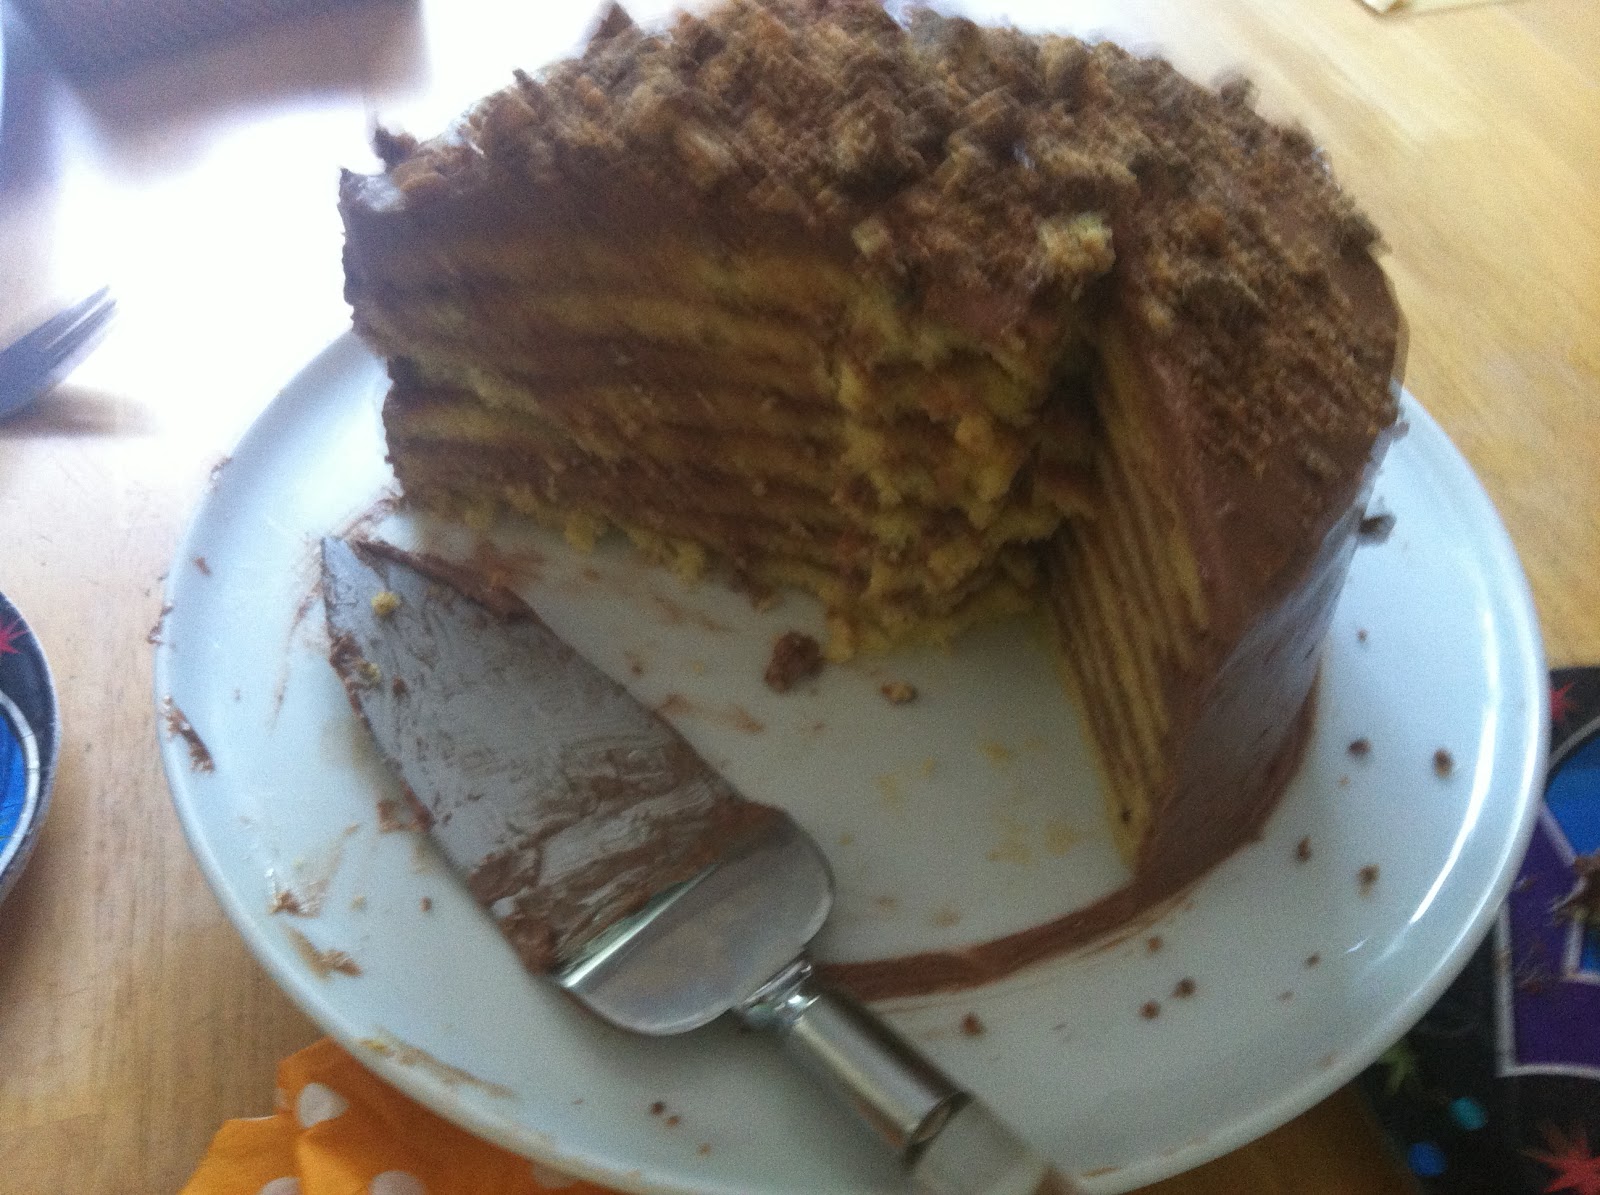
this was one of those moments where half way through consumption, I had the "H.S." moment of forgetting to take photos so here it is in half devoured form.  You can see the layers at least.


Smith Island Cake 


-Preheat your oven to 350 degrees.  Spray 4 8-inch round baking pans with nonstick baking spray or grease generously with butter and a heavy sprinkle of flour.  (I only own 3 8-inch rounds so I just did 3 rounds of baking instead of 2).


-In a food processor pulse 4 frozen large Reese's peanut butter cups into a fine powder and transfer into another bowl until later (I would suggest refrigerating  so they don't melt all together).  Pulse remaining 4 large Reese's peanut butter cups into small chunks and transfer to another bowl and chill.


-In the bowl of an electric mixer, mix together the following on low speed until well combined about 10 -12 minutes:

  • 8 tablespoons or 1 stick of unsalted butter, softened
  • 1  18 1⁄4-oz. box yellow cake mix, preferably Duncan Hines
  • 1 and 1/2 cups evaporated milk
  • 1 teaspoon vanilla extract
  • 4 eggs at room temperature 
  • 1/3 cup of water 
-Pour a thin layer of batter into the prepared baking pans (it comes out to be just around 2/3 of a cup.  You want it to completely cover the entire bottom of the pan but not too high at all because remember we are going for thin layers here.)  Set remaining batter aside for next rounds.   Bake until cooked through and golden around edges, 11–14 minutes. Set aside to let cool slightly, then loosen cake layers with a knife and invert onto cooling racks and then you can layer them with parchment on a cookie sheet until you are ready to assemble. Coat the pans with whatever method you are using and repeat the process a second and third time.  (Round 3 will only be 2 pans instead of 3 to get you to 8 layers).  

-As your cake layers are cooling, make your icing from the link listed above.  Take your first cake layer and spread about a 1/3 of a cup of frosting evenly onto it.  Sprinkle about 1 tablespoon powdered peanut butter cups onto the frosting and repeat with remaining layers. Frost outside of cake with remaining icing on top and sides and sprinkle peanut butter cup chunks on top.